
To light a mosaic patio heater, open the propane cylinder valve, push and turn the control knob to PILOT, press the piezo igniter button repeatedly until the pilot flame appears, then hold the knob down for 10 to 20 seconds to heat the thermocouple before releasing it. Once the pilot stays lit, rotate the knob to LOW and let it run for about five minutes, then move to your desired heat setting. That sequence covers the vast majority of mosaic-style heaters. If the pilot keeps going out, or you never see a spark, keep reading, this guide walks through both ignition methods, a pre-light safety checklist, and targeted fixes for every common failure.
How to Light Mosaic Patio Heater: Safe, Step-by-Step Guide

Grant Mercer
10 Aug 2026
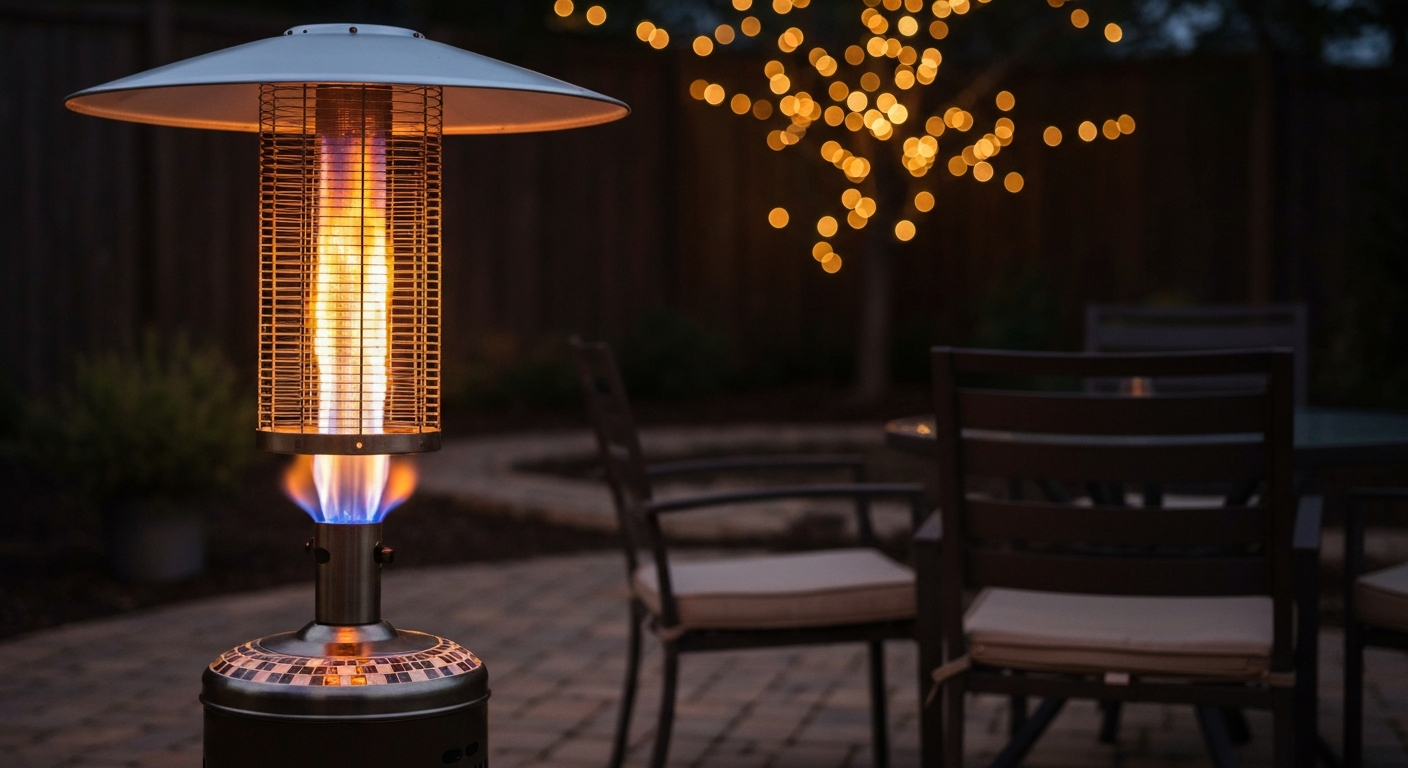
Quick-Start: Two-Minute Lighting Procedure
There are two ways to light any mosaic patio heater: the piezo push-button igniter built into most units, and a manual method using a long-stem lighter or long match through the ignition access hole. Use the piezo method first. Fall back to the manual method if the igniter produces no spark or the electrode is fouled.
Piezo (Push-Button) Method
- Confirm the cylinder valve is fully closed before connecting the hose. Hand-tighten the Type-1 (1-5/16" ACME) fitting onto the tank — it threads on clockwise.
- Perform a quick leak test (see the safety checklist below) before the first light of the season or after any hose/regulator change.
- Open the cylinder valve slowly, one full turn. Opening it fast can trip the regulator's excess-flow device and starve the burner of gas.
- Turn the control knob to OFF, then push it in and rotate to the PILOT position. You will feel a click or detent.
- While holding the knob fully depressed, press the piezo igniter button repeatedly — one click per second — until you see a small pilot flame at the burner head.
- Keep the knob held down for 10 to 20 seconds after the pilot lights. This heats the thermocouple so it produces enough millivoltage to hold the gas valve open.
- Release the knob slowly. If the pilot stays lit, rotate to LOW and let it stabilize for about five minutes.
- Move to MEDIUM or HIGH as needed. The main burner flame should be steady and blue with small yellow tips.
Manual Method (Long-Stem Lighter or Long Match)
- Locate the small ignition or pilot-access hole on the valve panel or burner housing. On most mosaic heaters it sits just below or beside the control knob.
- Light your long-stem lighter or long match before inserting it into the access hole. Never introduce an open flame and then try to light it inside the heater.
- Insert the lit flame into the access hole so the tip is near the pilot orifice.
- Push and hold the control knob in the PILOT position while the flame is in position.
- Hold the knob down for 15 to 45 seconds — manual lighting sometimes requires the longer end of that range because you are introducing less targeted heat to the thermocouple.
- Withdraw the lighter, release the knob slowly, and confirm the pilot stays lit before turning to LOW.
Safety Checklist Before You Light
Work through every item on this list before touching the control knob. These are not suggestions, a missed step here is how people get hurt.
- Gas shutoff confirmed: The cylinder valve must be fully closed while you connect, inspect, or clean the heater. Open it only when you are ready to light.
- Leak test every connection: Mix a 1:1 solution of dish soap and water in a spray bottle. Spray it on the hose-to-regulator fitting, the regulator-to-heater fitting, and the tank valve connection. Open the cylinder valve slowly and watch for persistent bubbles. Any bubble activity means a leak — close the tank, tighten or replace that fitting, and do not light the heater until it passes a clean retest. Never use an open flame to check for leaks.
- Tilt-switch check: Stand the heater on a firm, level surface. Give it a very gentle nudge — you should hear or feel the tilt switch reset if it had been tripped. If the unit was stored on its side, set it upright for at least 15 minutes before lighting so any residual liquid propane in the line can settle.
- Ventilation: Never operate a propane heater in an enclosed space, garage, or tent. Mosaic patio heaters are outdoor-only appliances. Use it in open air or a well-ventilated covered patio.
- Clearances: Keep at least 36 inches of clearance on all sides from combustible materials. The top of the heater needs at least 24 inches of clear space above it. Check your specific model's manual for exact figures — some Hiland HLDS01-series documents call for slightly tighter minimums, but the 36-inch side rule is a safe baseline.
- Cylinder condition: Use a modern 20 lb cylinder with an OPD (overfill prevention device) valve — required on all tanks made after 1998. Do not use a damaged, dented, or corroded cylinder.
- No ignition sources nearby: Clear any dry leaves, furniture cushions, or overhead structures before lighting.
Tools and Parts You May Need
You do not need a toolbox full of specialty gear for routine lighting and basic maintenance. Here is what I keep on hand for mosaic heater work:
- Long-stem butane lighter (at least 10 inches) or long matches — essential for the manual lighting method and for reaching the pilot access hole safely
- Spray bottle with 1: 1 soapy water solution — for leak testing every connection
- Adjustable wrench — for tightening or removing the regulator fitting and hose connections
- Small flathead and Phillips screwdrivers — for accessing the burner or valve panel cover
- Pipe cleaners or a small piece of thin wire — for clearing a clogged pilot orifice (the orifice hole is tiny; be gentle)
- Compressed air in a can — for blowing out debris from burner ports and the pilot assembly
- Replacement thermocouple or pilot assembly — match your model number; thermocouples for most consumer patio heaters are inexpensive and widely available
- Long-nose (needle-nose) pliers — for removing and reinstalling the thermocouple nut in tight spaces
- Handheld combustible gas detector — optional but genuinely useful if you suspect a slow leak that the soap-water test is not catching
Know Your Heater: Mosaic-Style vs Pyramid-Style
The term 'mosaic patio heater' typically refers to a mushroom-style or umbrella-shaped freestanding propane heater where the burner and emitter dome are at the top of a central pole, and the base usually features a decorative mosaic tile pattern. The gas control valve is located near the base, and the pilot and main burner are both positioned at the top of the pole inside the burner assembly. Most of these heaters run on 48,000 BTU, which is the same output as the popular Hiland HLDS01-series. The lighting procedure and thermocouple setup are nearly identical across brands of this style.
Pyramid-style heaters look completely different, they have a tall rectangular glass tube in the center with the flame visible through the glass, and the burner is located at the base of the glass column rather than at the top of a pole. The pilot assembly sits low on the unit, the control knob is usually at the base, and you access the pilot directly at ground level rather than at head height. If your heater has a glass fire column, the ignition sequence is similar in principle but the pilot location and access method differ meaningfully from a mosaic-top heater.
| Feature | Mosaic (Mushroom-Top) Style | Pyramid (Glass-Tube) Style |
|---|---|---|
| Burner location | Top of the pole, inside dome | Base of the glass tube column |
| Pilot access | Accessed at the top via the emitter assembly | Accessed at the base near the control panel |
| Control knob position | Near the base of the pole | At the base cabinet |
| Typical BTU output | 40,000 to 48,000 BTU | 40,000 to 46,000 BTU |
| Thermocouple location | Inside burner head at the top | Inside base burner chamber |
| Manual lighting access hole | Side of burner housing near the top | Side of base panel |
| Tilt switch location | Base of the pole | Base cabinet |
Step-by-Step: Lighting a Mosaic Patio Heater
This detailed sequence assumes a standard mosaic-top (mushroom-style) propane heater. The control knob is on the pole near the base, the pilot is inside the burner dome at the top, and the piezo igniter button is either on the valve housing or on a separate push-button mounted on the pole. For a general overview of propane heater ignition and step-by-step instructions, see how to light a patio heater.
Before You Start
- Run through the full safety checklist above. Do not skip the leak test.
- Confirm the tank is not empty. A 20 lb cylinder feels noticeably heavy when there is fuel left. If in doubt, weigh it — a full cylinder weighs around 37 to 38 lbs total; the tare (empty) weight is stamped on the collar.
- Check that the heater is standing straight and the tilt switch has not been tripped. A heater stored or shipped on its side may have a tripped tilt switch — stand it upright and wait a few minutes.
Connecting and Opening Gas Supply
- Make sure the control knob is in the OFF position before connecting the cylinder.
- Thread the regulator fitting onto the tank valve by hand, turning clockwise until snug. Finish with a quarter-turn from an adjustable wrench — do not overtighten.
- Open the cylinder valve slowly, no more than one full turn counterclockwise. A fast open can trigger the regulator's excess-flow shut-off and you will get little or no gas flow. If this happens, close the tank valve, wait 30 seconds, and reopen it slowly.
- Spray your soapy water on every fitting and watch for 30 seconds. No bubbles means you are good to proceed.
Igniting the Pilot
- Push the control knob in firmly and rotate it to the PILOT position. You should feel it click into the pilot detent.
- While holding the knob fully depressed, press the piezo button once per second. Watch through any gap in the emitter assembly or listen for the soft 'fwump' of the pilot catching.
- If you cannot see or hear the pilot light after 5 to 6 clicks, stop and wait 60 seconds to let any accumulated gas disperse before trying again.
- Once the pilot is lit, continue holding the control knob fully depressed for 10 to 20 seconds. This is the thermocouple warm-up period. Releasing too early is the most common reason the pilot goes straight back out. On older or slightly tired thermocouples, hold for the full 20 seconds.
- Release the knob slowly. The pilot flame should remain burning. If it goes out immediately, see the troubleshooting section below.
Lighting the Main Burner
- With the pilot confirmed lit, rotate the control knob from PILOT to LOW. The main burner should ignite from the pilot flame within a few seconds.
- Let the heater run on LOW for approximately five minutes. This allows the burner head and reflector to reach stable operating temperature.
- Rotate to MEDIUM or HIGH as desired. A healthy flame is predominantly blue with small yellow tips at the outer edge of the burner ring.
- If you see a large, sooty, orange flame, the burner ports may be clogged or the gas pressure may be off. Turn it down and investigate before continuing use.
Notes for Pyramid-Style Patio Heaters
If you have a pyramid heater with a central glass fire column, the fundamental gas-valve logic is the same, PILOT, hold for thermocouple heat-up, then to LOW, but there are a few physical differences worth knowing. For step-by-step instructions specific to a pyramid-style unit, see how to light a pyramid patio heater.
- The pilot assembly sits inside the base cabinet, not at the top of the unit. The control knob and ignition access hole are both at the base, so you do not need to reach overhead.
- The pilot access hole is typically a small round opening in the side panel of the base cabinet. When using the manual method, insert your long-stem lighter horizontally at ground level rather than vertically as you might on a mushroom-top heater.
- Some pyramid heaters use a battery-powered electronic igniter module instead of a purely mechanical piezo. If the igniter clicks but produces no spark, check the battery before condemning the igniter electrode. The battery compartment is usually inside the base cabinet.
- The glass tube on pyramid heaters is a combustion chamber and gets extremely hot. Never attempt to clean or access the tube interior while the heater is running or immediately after shutdown.
- Hold times for the thermocouple on pyramid heaters are typically in the 15 to 45 second range per standard manufacturer guidance — err toward the longer end on the first light of the season.
Ignition Failure Diagnostic Flow
Work through this decision tree in order. Most ignition problems fall into one of four symptoms, and most of those have a DIY fix.
| Symptom | Most Likely Cause | First Action | If That Fails |
|---|---|---|---|
| Clicking but no spark visible | Fouled/cracked igniter electrode or broken igniter wire | Inspect electrode tip for cracks, carbon buildup, or moisture; clean with dry cloth or light sandpaper | Replace piezo igniter or igniter module |
| Spark present but pilot won't light | No gas reaching pilot — empty tank, tripped regulator, or clogged pilot orifice | Confirm tank has fuel; close and slowly reopen cylinder valve; listen for gas hiss near pilot | Clean pilot orifice with a pipe cleaner or compressed air |
| Pilot lights but goes out when you release the knob | Thermocouple not getting hot enough — not held long enough, or thermocouple failing | Repeat lighting and hold knob for the full 20 seconds; position pilot flame directly on thermocouple tip | Test thermocouple millivolt output; replace if below spec |
| Pilot stays lit but main burner won't ignite | Clogged main burner orifice or blocked burner ports | Run on LOW for 5 minutes and try again; inspect burner ports for spider webs or debris | Clear burner ports with compressed air; clean orifice carefully |
| Weak or uneven main flame (low BTU feel) | Partial blockage, low regulator pressure, or kinked hose | Straighten hose; check for kinks; confirm regulator is not in excess-flow lockout | Replace regulator/hose assembly with manufacturer-approved part |
| No clicking sound when pressing igniter button | Failed piezo mechanism — internal spring or crystal broken | Check that the igniter button is fully seated and not jammed | Replace piezo igniter assembly |
Troubleshooting: When the Heater Won't Light at All
This section goes deeper on the two most frustrating scenarios: the heater that produces no flame at all, and the pilot that lights but will not stay lit. Work through these in the order listed, the top items are the most common and the cheapest to fix.
Gas Supply Checks
Start here before touching anything else. An empty or nearly empty tank is the single most common reason a heater stops working. Weigh the cylinder or pour warm (not hot) water down the side of it, propane absorbs heat as it vaporizes, so the tank will feel cold up to the level where liquid propane remains. If it reads below about 10% full, swap the cylinder.
If the tank has fuel but gas flow seems low or nonexistent, you may have tripped the regulator's excess-flow device. Close the cylinder valve completely, wait 30 seconds, and reopen it very slowly, about a quarter turn at first, then gradually to one full turn. This resets the excess-flow mechanism. Many owners have thrown away a perfectly good regulator because they did not know this trick.
Regulator and Hose Inspection
Use only the regulator and hose assembly supplied with your heater, or a direct manufacturer-approved replacement. Third-party regulators may not deliver the right pressure for your burner, most mosaic patio heaters require a minimum gas supply pressure around 10 inches of water column (in. W.C.) for proper operation. A regulator that has been frozen, dropped, or stored in extreme heat can fail internally with no visible damage. If the heater has been running fine for years and suddenly produces a very weak flame despite a full tank, a failed regulator is the top suspect. Replace it as a unit, do not attempt to open or rebuild a propane regulator yourself.
Inspect the hose from regulator to valve for kinks, cracks, or abrasion. A hose that has been pinched under a wheel or caught in a door can restrict flow significantly. If the rubber feels stiff or cracked, replace it regardless of whether it is causing an issue right now.
Control Valve and Pilot Orifice
The pilot orifice is a tiny brass fitting with a very small drilled hole, its job is to meter propane to the pilot flame. Spider webs are the number-one cause of pilot orifice blockages on patio heaters that have been stored outdoors. The orifice sits at the end of the pilot tube, and even a single strand of web can block enough gas to prevent the pilot from lighting. Remove the pilot assembly access panel (usually two screws), locate the orifice, and carefully clean it with a pipe cleaner or a thin wire. Do not use a drill bit or any tool that could enlarge the hole, even a small enlargement will alter the gas/air mixture and create a soot-producing flame.
Thermocouple: Testing and Replacement
If the pilot lights and burns steadily but goes out the moment you release the control knob, the thermocouple is almost certainly the issue. The thermocouple is a small metallic probe with its tip positioned directly in the pilot flame. When heated, it generates a small DC voltage, typically 20 to 30 millivolts, that tells the gas valve it is safe to stay open. You can test it with a multimeter set to millivolts: light the pilot, hold the knob for 30 seconds, then measure across the thermocouple leads. A reading well below 20 mV with the pilot fully burning indicates a failing thermocouple. Replacement is a straightforward DIY job: the thermocouple nut on most consumer patio heaters threads into the valve body and can be removed with long-nose pliers and a small wrench. Match the replacement to your exact model number.
Tilt Switch Problems
A tripped or faulty tilt switch will prevent any gas from flowing regardless of what else you do. The tilt switch is a safety device, usually a mercury or ball-bearing switch, located at the base of the heater. If the heater was bumped, stored on its side, or the base was jostled, the switch may have tripped and not reset. Stand the heater fully upright, gently rock it back to vertical, and try lighting again. If the switch is damaged or stuck, it will need replacement, this is a model-specific part, so have your model number ready. Do not attempt to bypass the tilt switch. That safety device exists to shut off gas if the heater falls over, and removing it is dangerous.
When to Stop and Call a Pro
There are a few situations where the right call is to stop DIY work and contact a qualified propane service technician. See Propane Education & Research Council, When to Use a Qualified Professional (installation, repairs, persistent abnormal operation) for industry guidance on situations that require a qualified propane service technician Propane Education & Research Council — When to Use a Qualified Professional (installation, repairs, persistent abnormal operation). If you smell gas and cannot identify the source after a thorough leak test, do not use the heater and call for service. If you see soot buildup on the emitter or reflector, or the flame is consistently orange and sooty even on a clean burner, there may be a combustion issue that requires professional diagnosis. If any internal gas valve component is damaged, or if you have reassembled the valve and are unsure about the result, have a qualified technician inspect it before use. Persistent ignition problems after replacing the thermocouple and cleaning the orifice, especially on a unit more than five or six years old, may indicate an internal valve seat failure that is not a DIY repair.
Finding Your Mosaic Heater's Manual
A surprising number of ignition problems can be solved by reading the specific hold-time and pilot procedure in your model's own documentation, especially for Hiland and Vulcan units, which have model-specific quirks. If you need the manufacturer's instructions, search for your 'mosaic patio heater manual' using the heater's full model number from the rating plate on the base. Kenmore / Typical patio heater manual, Type 1 Tank Connection (1‑5/16" ACME) and OPD references confirms the common Type‑1 (1‑5/16" ACME) cylinder connection and the requirement for an overfill‑prevention device (OPD) on modern 20 lb propane cylinders blank" rel="noopener noreferrer">Kenmore / Typical patio heater manual — Type 1 Tank Connection (1‑5/16" ACME) and OPD references. For Hiland models, the HLDS01-series manual is the most widely applicable, it covers the 48,000 BTU propane heater that is sold under several brand names and through multiple retailers. If your heater has a Hiland label or shares the same body style, that manual's sequence (push to PILOT, press piezo, hold 10 to 20 seconds) is authoritative. For step-by-step instructions specific to Hiland units, see how to light Hiland patio heater. Vulcan-branded patio heaters follow a similar control layout but may have slightly different thermocouple hold times and access panel configurations, the Vulcan manual should be your first reference for those units. Refer to the Vulcan patio heater manual for exact hold times and access-panel details. When looking up your manual, have the full model number from the rating plate on the base of the heater, not just the brand name.
FAQ
Immediate step-by-step procedure to light a mosaic patio heater (quick): piezo/press-button
1) Move heater to a stable, level, cleared location and confirm clearance from combustibles. 2) Close regulator/cylinder valve and inspect hose/connection. 3) Perform a quick leak check: apply soapy water to connections, slowly open cylinder — no persistent bubbles. If bubbles appear, close valve and tighten/replace fittings. 4) Open cylinder valve fully or as manufacturer directs. 5) Set control knob to OFF, then depress/turn to PILOT. 6) While holding the control knob depressed, press the piezo/igniter repeatedly until a visible pilot spark and flame appear. 7) Keep holding the control knob for 10–20 seconds (follow your manual: some models require up to 45s) to allow the thermocouple/thermopile to heat. 8) Release the control knob — pilot should stay lit. 9) Turn to LOW and run ~5 minutes, then set desired heat. 10) If pilot won’t light with piezo, switch to manual/long-lighter method (see next FAQ).
Immediate step-by-step procedure to light a mosaic patio heater (manual long‑lighter or match method)
1) Follow steps 1–4 from piezo procedure (location, leak check, open cylinder). 2) Remove any access panel or locate the small pilot/ignition hole per your manual. 3) Turn control knob to PILOT and depress/hold. 4) Insert a long-stem gas lighter or long match into pilot access hole and ignite the pilot while holding the control knob. 5) Continue holding the knob for 15–45 seconds to heat the thermocouple/thermopile. 6) Release knob — pilot should remain lit. 7) Switch to LOW for a few minutes, then to desired setting. Never insert fingers near burner and always follow the specific hold-time in your model manual.
Prioritized safety checklist before attempting to light or service a patio heater
1) Location & clearance: stable level surface and manufacturer minimum clearances (keep combustibles away). 2) Cylinder & connections: use correct Type‑1/ACME tank and supplied regulator/hose; ensure OPD cylinder is seated. 3) Leak test: soap solution bubble test on all connections after slowly opening cylinder valve. 4) Tip/tilt switch: confirm tilt-safety device exists and is operational (unit upright). 5) Visual inspection: no visible damage, kinked hose, corrosion, or soot. 6) Ventilation: use outdoors only in open-air areas per instructions. 7) Don’t bypass safety devices: never bypass thermocouple/tilt switches. 8) If you detect a persistent leak, smell gas strongly, or see damaged gas parts — close valve, move away, and call a qualified technician or gas supplier.
Short diagnostic flow for most common ignition failures (won’t light, won’t stay lit, weak flame, clicking/no spark)
1) Confirm fuel: is cylinder valve open and not empty? Replace/verify tank. 2) Leak test: if leak suspected, stop; fix leak then retry. 3) No spark/clicking but no visible spark: inspect piezo electrode for fouling/crack, check wiring/grounding, replace igniter if faulty. 4) Pilot lights but won’t stay lit: hold control knob longer to heat thermocouple; if still fails, test/replace thermocouple/thermopile. 5) Weak/uneven flame: clean pilot orifice and burner ports (pipe cleaner/compressed air), check regulator/hose for kinks or obstructions and ensure adequate supply pressure (manufacturer minimum ≈10" W.C.). 6) Main burner won’t light though pilot is on: ensure main orifices are clean and valve shifts correctly; if pilot voltage insufficient, replace thermopile/valve assembly. 7) If piezo sparks but no ignition and you hear hissing of gas, do not continue; close valve and call pro if unsure.
Tools, consumables and spare parts a homeowner should have on hand
Long-stem gas lighter or long matches, soapy leak-test solution in spray bottle, adjustable wrench set, small screwdrivers, pipe cleaners/small wire, compressed air can or blower, soft brush, replacement thermocouple/pilot assembly (model-specific), replacement piezo igniter or electrode, replacement regulator/hose assembly (manufacturer-approved), and optionally a handheld combustible gas detector.
Model/manual lookup: where to find Hiland and Vulcan specific ignition steps
Hiland HLDS01-series ignition and safety steps are in the Hiland owner manual (example PDF: Hiland HLDS01-WCGT). Look in the manual for PILOT ignition, hold times, and leak-test instructions. For Vulcan and other brands, search the exact model number + "owner's manual" or check the brand support site. Manufacturer manuals include model-specific pilot access locations, hold times, and parts lists — always follow those instructions over generic advice.