
To store a patio heater safely, disconnect and remove the propane cylinder (or isolate the gas line for natural gas models), clean and dry every surface, protect sensitive components like the emitter and ignition assembly, and keep the heater in a dry, covered location where it won't tip over. The exact steps differ depending on whether you have a propane tower, a natural gas post, or an electric unit, so I've broken this guide out by fuel type after covering the prep work that applies to all of them.
How to Store Patio Heater: Complete Safe Storage Checklist

Grant Mercer
13 Aug 2026
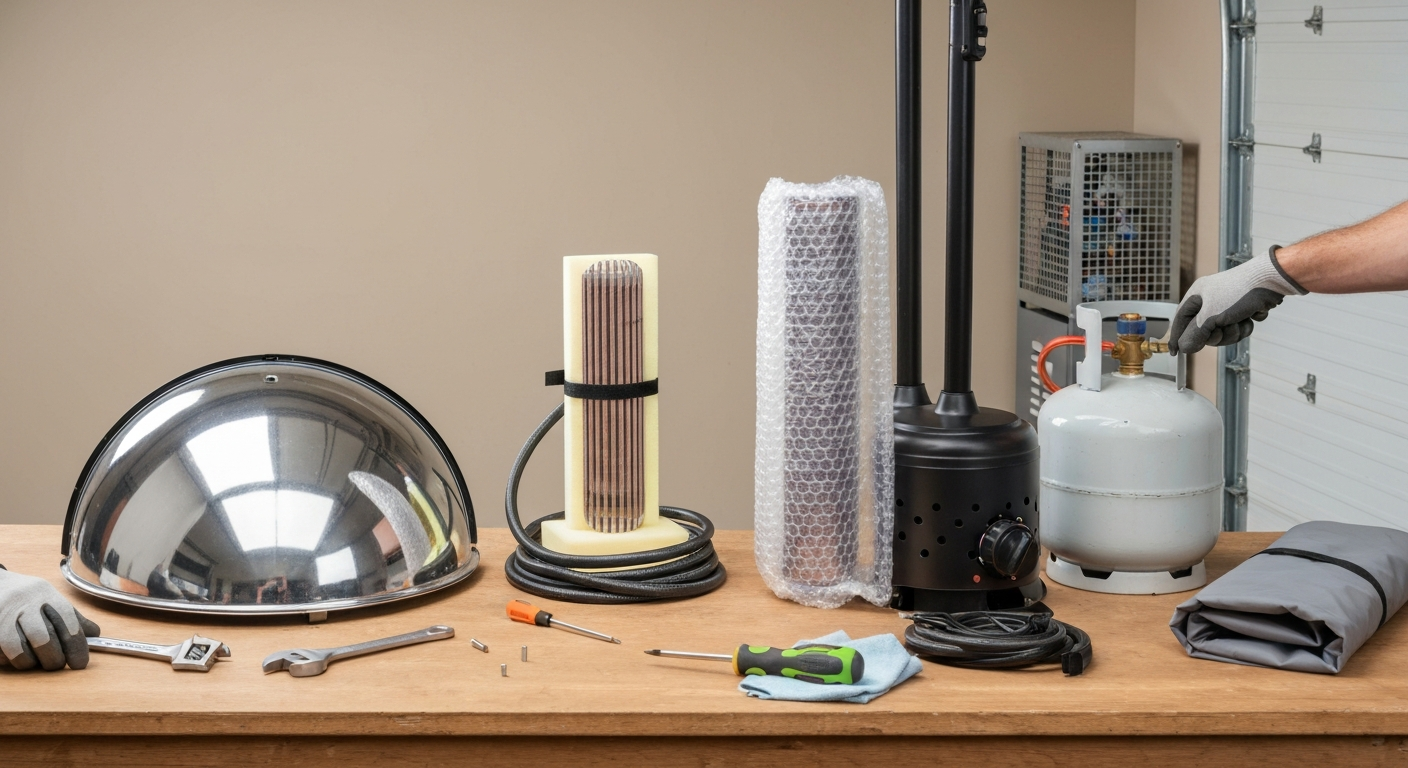
Patio heater types and what's inside them
Before you put anything in storage, it helps to know what you're working with. Patio heaters come in three fuel types: propane, natural gas, and electric. Within those categories, the two most common physical forms are tower (also called freestanding or mushroom) heaters and umbrella-style heaters. Tower heaters are usually 7 to 9 feet tall with a circular reflector dome at the top. Umbrella heaters mount under a patio umbrella frame. Both styles share the same core components: a burner assembly, a reflector, an ignition system, and a tilt-switch safety cutoff.
Two components worth knowing by name before you start storing: the flat emitter and the long-stem lighter. A flat emitter is the ceramic or metal tile burner surface used on infrared patio heaters instead of an open flame. It glows orange when working correctly and is fragile if knocked or stored without protection. A long-stem lighter (sometimes called a fireplace lighter or wand lighter) is the extended ignition tool used to manually light burners that are too deep or too hot to reach with a standard lighter. If your heater uses one, it likely lives in a bracket on the pole. Both items need their own care during storage. For more detail, read what is a long stem lighter for patio heater to learn how these wand lighters work and how to store them safely.
Safety hazards to sort out before you start
Storage-related accidents with patio heaters fall into a few predictable categories: propane leaks from improperly capped cylinders, corrosion that damages the thermocouple or tilt switch over winter, and electrical faults from moisture getting into a cord or control box. None of these are exotic problems. They're the kind of damage that leads to a no-ignition diagnosis or a won't-stay-lit complaint the following spring, which is exactly the sort of repair call you'd rather skip.
Check your owner's manual before you do anything else. Hampton Bay, Bromic, and most other major brands include a dedicated storage section in their manuals, and those instructions are specific to your regulator type, hose length, and igniter design. If you don't have the paper manual, model-specific manuals are usually available as PDFs from the manufacturer's site or a resource like this one.
Also check your local rules. NFPA 58 (the Liquefied Petroleum Gas Code) is the national standard for LP-gas cylinder storage, but local fire marshals adopt it and often add restrictions on top of it. Some jurisdictions prohibit storing propane cylinders within 10 feet of an apartment building, and many HOAs or municipalities restrict propane on balconies entirely. A quick call to your local fire marshal's non-emergency line takes about two minutes and can save you a fine or, more importantly, a fire.
Tools and materials you'll need
- Adjustable wrench or basin wrench (for regulator connections on propane models)
- Flathead and Phillips screwdrivers (for access panels, emitter guards, and battery compartments)
- Soft-bristle brush or nylon scrub pad (for burner surfaces and reflectors)
- Mild dish soap or dedicated stainless steel cleaner
- Clean, dry microfiber cloths or lint-free rags
- Spray bottle of isopropyl alcohol (for glass globes and electronic contact points)
- WD-40 or a dry PTFE lubricant spray (for metal pole joints and hardware to prevent seizing)
- Rust-inhibiting spray or wax (for uncoated metal parts)
- Replacement propane cylinder cap or collar (if yours is missing)
- Weatherproof patio heater cover sized for your model
- Bungee cords or nylon straps (for securing during transport or outdoor storage)
- Bubble wrap or foam padding (for flat emitter tiles if removed)
- Small zip-lock bags (for screws and small hardware if you're disassembling)
Cleaning and drying before storage
This step is the one most people skip, and it's the reason their heater comes out of storage with a rusted reflector or a clogged burner. Storing a dirty heater traps moisture against metal surfaces and accelerates corrosion through the off-season. Plan for 30 to 45 minutes to do this properly.
Metal pole, base, and housing
- Wipe down the entire pole and base with a damp cloth to remove surface dirt, bird droppings, and grease.
- For stubborn grease near the burner housing, use a few drops of dish soap on a nylon scrub pad. Avoid abrasive pads on stainless steel — they scratch the finish and create pitting where rust starts.
- Rinse with a clean damp cloth, then dry thoroughly with a microfiber rag.
- Apply a thin coat of rust-inhibiting spray or paste wax to bare metal sections, especially the lower pole and base where water pools.
- Treat any exposed bolts, nuts, and joints with WD-40 or dry PTFE spray so they don't seize over winter.
Glass globe (if present)
- Remove the glass globe carefully — most tower heaters have a twist-lock or lift-off globe held by a wire guard.
- Clean with a spray of isopropyl alcohol and a lint-free cloth. Avoid ammonia-based glass cleaners near rubber seals.
- Inspect the glass for hairline cracks before storage. A cracked globe is a hazard when relit — replace it rather than risk it.
- Wrap the globe in a clean towel or store it in its original packaging if you kept it.
Reflector dome
- Wipe the underside of the reflector dome with a damp cloth. The inside collects grease and carbon deposits from combustion.
- For stubborn carbon buildup, a paste of baking soda and water applied with a soft brush works well. Rinse and dry completely.
- Do not use steel wool or wire brushes on a polished reflector — they permanently damage the reflective finish.
Flat emitter surface
If your heater uses a flat emitter (common on infrared models), treat it with extra care. Ceramic tile emitters crack if struck or stored improperly. Let the emitter cool completely, then brush away carbon deposits gently with a dry, soft-bristle brush. Do not use water or chemical cleaners on ceramic emitter tiles. If you're removing the emitter for storage, wrap it in bubble wrap or foam padding and store it upright, not flat-stacked under other items.
Burner and ignition assembly
Brush any debris out of the burner ports with a dry nylon brush. Spider webs and wasp nests in the burner tube are among the top causes of ignition failure and gas pressure issues in the spring. If you can access the thermocouple tip (the small metal probe near the flame path), wipe it with a dry cloth. A corroded thermocouple is one of the most common reasons a heater won't stay lit after winter storage, so getting it clean and dry now saves a diagnostic session later.
Disconnecting propane safely
This is the step that requires the most care. Propane is heavier than air, meaning any small leak pools at ground level and can reach an ignition source before you detect it. Do this outdoors, away from any open flames, pilot lights, or electrical sparks.
- Turn the burner control knob fully to OFF.
- Turn the cylinder valve clockwise until it stops — this is the main shutoff. Do not force it.
- Leave the control knob at OFF and wait about 30 seconds. Any gas remaining in the hose will exhaust through the regulator.
- Unscrew the regulator from the cylinder valve. Most regulators on consumer patio heaters are hand-tightened POL fittings — they turn counterclockwise to remove (left-hand thread, so 'righty loosey' is reversed here). If yours has a hand wheel, use that instead of gripping the hose.
- Once the regulator is off, immediately thread the valve protection cap back onto the cylinder valve outlet. NFPA 58 requires this, and it physically prevents debris and moisture from entering the valve.
- Coil the regulator hose loosely and secure it with a Velcro tie or twist tie. Kinks in the hose can cause pressure problems when you reconnect in the spring.
A note on depressurizing: on most consumer propane patio heaters, turning the burner knob to OFF and then turning the cylinder valve off is sufficient. You do not need to 'purge' the hose on standard residential setups. If you smell any gas at any point during disconnection, move away from the heater, do not operate any electrical switches, and ventilate the area before continuing.
Storing the propane cylinder
The cylinder itself requires its own storage plan, and this is where a lot of homeowners make preventable mistakes. The rules here come from NFPA 58 and are consistent with guidance from propane suppliers like AmeriGas and the AGA.
| Rule | Why it matters | Common mistake |
|---|---|---|
| Store cylinder upright at all times | Keeps the safety relief valve in contact with vapor, not liquid propane, so it functions correctly | Laying the cylinder on its side in a shed or car trunk |
| Keep the valve protection cap or collar in place | Prevents valve damage and blocks moisture and insects from entering the outlet | Storing without the cap because it was lost |
| Outdoors or in a detached, ventilated structure only | Propane vapor can accumulate in enclosed spaces and reach explosive concentration | Storing in a basement, attached garage, or under a deck |
| Away from heat sources and direct flame | Cylinders can overheat and vent through the relief valve near open flame | Storing next to a grill, water heater, or HVAC unit |
| Never in a passenger vehicle interior for extended periods | Vapor buildup in a sealed car interior is a serious fire and explosion risk | Transporting and leaving cylinder in the car overnight |
The best storage spot for a 20 lb patio heater cylinder is outdoors on a level surface, secured so it can't tip over, in a location that stays shaded and dry. A small propane cylinder cage or a dedicated propane storage locker sold at hardware stores works well. If you live somewhere with freezing winters, propane cylinders handle cold temperatures fine, the concern is heat, not cold.
Check your cylinder's requalification date while you have it in hand. DOT regulations (49 CFR) require that standard propane cylinders be requalified every 12 years from the manufacture date stamped on the collar. PHMSA, Hazardous Materials (publications & guidance) notes that PHMSA and DOT hazardous‑materials guidance and 49 CFR rules apply to transporting and requalifying LP‑gas cylinders and that DOT cylinder specifications and certain special provisions or exceptions may apply in narrow cases PHMSA — Hazardous Materials (publications & guidance). An expired cylinder may be refused by propane exchange programs or filling stations. If yours is overdue, trade it in rather than storing it for another season.
Natural gas heaters: isolating the line before storage
Natural gas patio heaters are permanently connected to your home's gas supply, which makes storage different from propane. You're not removing a cylinder. Instead, you're isolating the appliance from the line and protecting the fittings and hose from off-season damage.
- Turn the heater's control knob to OFF.
- Locate the dedicated appliance shut-off valve on the gas line feeding the heater. This is typically a quarter-turn ball valve on the supply line, either at the heater base or along the exterior wall. Turn it to the OFF position (handle perpendicular to the pipe).
- Do not attempt to cap, cut, or modify the gas line itself. If there is no dedicated shut-off valve and you want to isolate the heater from the supply, call your gas utility or a licensed plumber to install one. Utilities like SoCalGas are explicit that homeowners should not attempt to cap gas piping and that the gas company must restore main service if shut off at the meter.
- Inspect the flexible connector hose (the corrugated metal or rubber hose between the wall fitting and the heater) for cracks, corrosion, or kinks. These hoses have a recommended service life — check yours for a date code. If it looks degraded, replace it before the next season rather than after.
- Cover the hose connection and any open fittings at the heater with plastic end caps or waterproof tape to keep insects, spiders, and moisture out of the orifices over winter.
- Cover the heater with a weatherproof cover rated for outdoor use.
Natural gas tower heaters are often left in place year-round because moving them means capping or disconnecting a fixed line. That's fine, but 'leaving it in place' doesn't mean ignoring it. Corrosion in the burner assembly and valve components is the most common off-season damage I see on natural gas models. The cleaning steps above still apply, and a proper cover makes a real difference.
Electric heaters: protecting cords, controls, and batteries
Electric patio heaters look the most straightforward to store, but moisture damage to cords, control boxes, and battery compartments is genuinely common and leads to trips, GFCI faults, or dead controls in the spring. Take a few extra minutes here.
Powering down safely
- Turn the heater off at the control switch and let it cool for at least 20 minutes.
- Unplug the power cord from the outdoor receptacle. Do not yank by the cord — grip the plug body.
- If the heater is hardwired (common for ceiling-mount or wall-mount electric models), switch off the dedicated circuit breaker and, ideally, lock it out. For anything hardwired, Heatstrip and similar manufacturers specify that all service and storage disconnection should be performed by a licensed electrician. If you're not certain whether your unit is hardwired or plugged in at a junction box, have an electrician check before you attempt to disconnect it.
Cords and plugs
Coil the power cord loosely (figure-eight coils reduce internal wire stress better than circular coils for long cords). Secure with Velcro ties rather than plastic zip ties, which can cut into the insulation over time. Inspect the full length of the cord for cuts, fraying, or cracked insulation. Any damage means the cord should be replaced before the heater is used again, not taped over. Store the coiled cord inside a plastic bag or wrap it in a cloth to keep it clean and dry.
Control boxes and remote receivers
If your electric heater has an external control box or remote receiver mounted on the unit, remove it if the design allows and store it indoors. Moisture is the primary enemy of these components over winter. Wipe the contacts with a dry cloth, seal any exposed terminal connectors with plastic end caps, and store the control box in a zip-lock bag with a silica gel desiccant packet.
Batteries in remotes and control panels
Remove all batteries from remote controls and battery-powered igniter modules before storage. Alkaline batteries left in devices for months can leak and corrode the battery contacts, which is often an irreversible failure. If your heater uses a rechargeable lithium-ion pack (some newer electric models do), do not toss it in the trash. EPA guidance specifies that lithium-ion batteries should be stored with their terminals taped or insulated to prevent short circuits, placed in individual plastic bags, and dropped off at a designated battery recycling location (Call2Recycle or a local household hazardous waste program). See EPA, Used Lithium‑Ion Batteries (consumer guidance for storage & recycling) for consumer guidance: tape or insulate terminals, place batteries in individual plastic bags, and drop them off at Call2Recycle or a local household hazardous waste recycling location blank" rel="noopener noreferrer">EPA — Used Lithium‑Ion Batteries (consumer guidance for storage & recycling). If you're keeping the rechargeable pack for next season, store it at roughly 50 percent charge in a cool, dry location, not in a garage that sees extreme temperatures.
Minor disassembly for compact storage
Most tower patio heaters are designed to partially disassemble for storage. The upper section (dome, reflector, and emitter) typically lifts or unbolts from the mid-pole, and the pole itself often separates into two sections. Check your manual for the specific attachment points. Disassembly lets you store a 7-foot heater in a 4-foot space, which matters if you're working with a small garage or a storage unit.
- Remove the reflector dome first — typically 3 to 4 screws on the dome rim, or a twist-lock collar. Put the screws in a labeled zip-lock bag.
- Lift the emitter guard and emitter assembly off the burner head. Wrap the emitter in foam or cloth before stacking.
- Separate the upper pole section from the lower by loosening the collar clamp or removing the bolts at the mid-pole joint.
- Store all small hardware (screws, bolts, washers) in a single labeled bag taped to the inside of the base, so you're not hunting for them in the spring.
- If your long-stem lighter is stored in a bracket on the pole, remove it and store it indoors. The fuel in a butane wand lighter degrades, and the igniter tip corrodes if left outdoors all winter.
Covers, indoor vs outdoor storage, and preventing tip-overs
A proper cover is one of the most effective things you can do to extend your heater's life. Look for covers rated for outdoor use with a polyester or Oxford fabric outer shell and a soft inner lining. Avoid generic tarps, which trap condensation underneath and create a moisture problem worse than no cover at all. Most major brands sell model-specific covers that account for the dome shape and pole height. Universal tower heater covers labeled for 87-inch to 96-inch heaters fit most standard models.
| Storage location | Pros | Cons | Best for |
|---|---|---|---|
| Indoors (garage or shed) | Maximum protection from moisture, UV, and freezing; easy access for spring prep | Requires space; natural gas models can't move indoors | Propane and electric heaters in regions with harsh winters |
| Covered outdoor area (porch, carport) | Convenient, no disassembly needed, good for natural gas models | Still exposed to temperature swings; needs a good cover | Natural gas heaters; mild climates |
| Outdoors uncovered | No effort | Accelerates corrosion, UV fading, and component damage significantly | Not recommended for off-season storage longer than a few weeks |
Tip-over prevention during storage is often overlooked but genuinely matters, a heater that falls in a garage can crack the emitter, bend the pole joint, or puncture the propane hose connection. For step-by-step methods on preventing falls and securing heaters, see how to keep patio heater from tipping over. If storing upright, secure the heater to a wall stud with a bungee cord or a wall-mount bracket. If you're storing it lying down in sections (after disassembly), pad the pieces and make sure nothing heavy is stacked on top of the emitter assembly or the glass globe. For more on preventing tip-overs and anchoring heaters, see how to secure a patio heater (internal resource).
Pre-use inspection and restart checklist for spring
Getting the heater out of storage is only half the job. Before you run it for the first time each season, work through this checklist. It takes about 15 minutes and catches the problems that turn into expensive repairs if you ignore them.
- Inspect the burner tube and ports for spider webs, wasp nests, or debris. Clear with a dry brush before connecting any gas.
- Check the thermocouple tip for corrosion (a gray or white coating). Light surface oxidation can be cleaned with fine steel wool. Heavy pitting or physical damage means replacement.
- Inspect the regulator hose for cracks, brittleness, or kinks. Any compromised hose must be replaced, not reused.
- Reconnect the propane cylinder and tighten the regulator fitting by hand, then a quarter-turn with a wrench.
- Perform a leak test before lighting: mix a few drops of dish soap in water and brush the solution over every connection point (regulator fitting, hose connections, valve body). Turn the cylinder valve on slowly. Bubbles mean a leak — turn the gas off immediately, tighten the fitting, and retest. If bubbles persist at the same point, the fitting or hose needs replacement.
- Check the tilt switch by gently tilting the heater about 30 degrees — you should hear or feel the switch click and the gas flow should stop. If the heater keeps running when tilted, the tilt switch needs inspection before you operate the heater around people.
- Test the igniter by pressing the ignition button before opening the gas. You should hear a clear clicking spark. A weak or absent spark means the igniter battery (if battery-powered) or the piezo igniter itself needs attention.
- For electric heaters, inspect the cord insulation end to end before plugging in. Plug into a GFCI-protected outdoor outlet, which is required by the NEC for most outdoor receptacles.
When to call a pro instead of doing it yourself
Most storage and pre-season prep is solidly in DIY territory. But a few situations call for a licensed technician. If you smell gas after reconnecting and the leak test doesn't identify an obvious loose fitting, stop and call a propane technician. If your natural gas heater has no dedicated shut-off valve and you need one installed, that's a plumber or gas fitter job. If your hardwired electric heater's control wiring shows signs of moisture damage or the circuit breaker trips when you restore power, have a licensed electrician evaluate it before you run the heater. These aren't situations where extra caution is excessive. They're cases where the failure mode is serious enough that professional involvement is the practical choice.
FAQ
What are the basic, universal steps for storing any patio heater safely?
Clean and dry the heater thoroughly; disconnect power or fuel; remove batteries; protect ignition and sensitive parts; drain or remove propane cylinders and cap valve outlets; apply rust-prevention to exposed metal; cover with a fitted, breathable cover or store in a dry indoor location; secure the heater to prevent tipping during storage or transport; and perform a pre-use inspection and leak test before restarting.
How should I clean a patio heater before storage?
Turn the heater off and cool completely. Brush or vacuum loose debris, wipe down surfaces with mild detergent and water, remove grime from burners and reflectors using a soft brush, and rinse if needed. Dry every component fully—use compressed air for tight areas and allow at least 24 hours of air-drying before storing to prevent corrosion and mold.
What must I do with propane cylinders before storing the heater?
Turn the cylinder valve fully off, disconnect the regulator, remove the cylinder from the heater, install the cylinder valve’s protective cap or collar, transport and store the cylinder upright and secured, and keep cylinders outdoors or in a ventilated location per NFPA 58 and local rules. Never store propane cylinders in basements, attics, or enclosed living spaces.
Can I store a propane cylinder indoors with the heater?
No. Per NFPA guidance and typical manufacturer instructions, propane cylinders should be stored outdoors in an upright, ventilated location. Indoor storage is restricted and may be illegal depending on local code and quantities. If in doubt, consult local fire code or your propane supplier.
How should I handle small nonrefillable cylinders (e.g., 1-lb) used with tabletop heaters?
Remove and dispose or recycle empty nonrefillable cylinders per local rules. If storing unused small cylinders temporarily, keep them upright, capped/plugged if provided, in a ventilated outdoor area away from heat sources. Never store them inside enclosed spaces for extended periods.
What should I do with natural‑gas connected patio heaters before storage?
Shut off the appliance valve and, if you need to isolate piping or work on the heater, shut off the supply per your utility’s guidance. Do not attempt to cap or cut gas piping yourself—call the gas company or a licensed technician for service. If disconnecting flexible connectors, seal open pipe ends per code and re‑test for leaks on reassembly.