
To light most propane patio heaters: open the cylinder valve, push and turn the control knob to PILOT, press the igniter button until the pilot catches, then hold the knob in PILOT position for a full 30 to 60 seconds before slowly releasing it. See the blank" rel="noopener noreferrer">MR. HEATER Operating Instructions & Troubleshooting (pilot hold time, pilot flame checks, cleaning advice) for the manufacturer's guidance on holding the control in PILOT for 30–60 seconds, verifying a blue pilot flame that envelops the thermocouple, and routine pilot/orifice cleaning procedures. If the pilot stays lit, turn the knob to your desired heat setting. If it goes out immediately, hold longer, the thermocouple needs that time to heat up and signal the gas valve to stay open. Everything else in this guide builds on that core sequence and covers every heater type, every common fault, and exactly when to stop and call someone.
Patio Heater Lighting Instructions: Step-by-Step Guide

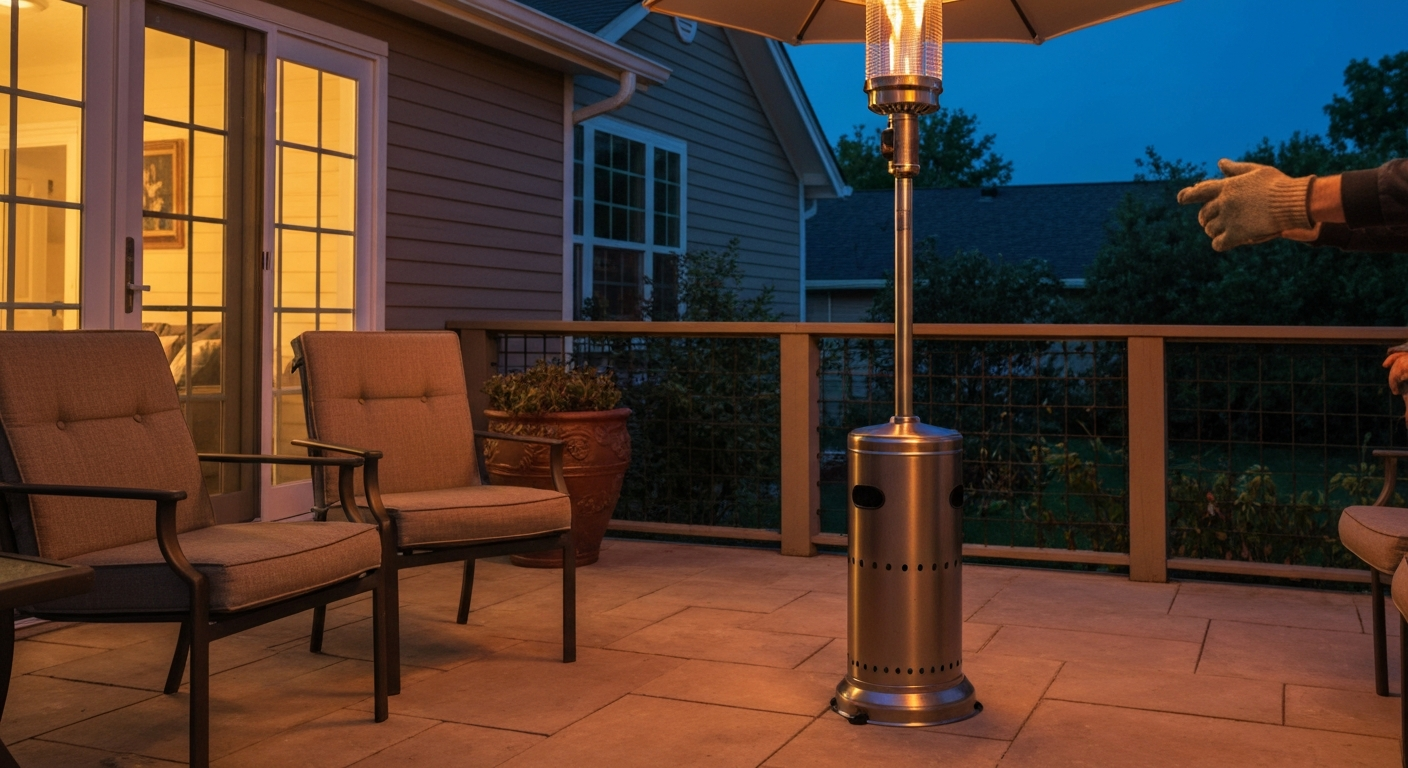
Quick-start checklist: safe lighting today
Before you touch any control, run through this list. For additional patio heater tips, see the related section in this guide. It takes two minutes and it catches the faults that cause most failed lighting attempts and near-misses. Tick each one off mentally before you move on.
- Heater is outdoors or in a well-ventilated space — never light a gas patio heater indoors or in a garage.
- Heater is standing upright on a flat, stable surface — the tilt switch will prevent lighting if the unit is leaning.
- Area within 3 feet of the heater is clear of people, furniture, and anything flammable.
- Overhead clearance is at least 3 feet from the emitter head to any structure, umbrella, or overhead cover (check your specific manual — some commercial models require more).
- Propane cylinder is not empty, not overfilled, and sits upright in the base.
- Regulator and hose are connected snugly — hand-tight plus a quarter-turn with a wrench.
- No smell of gas in the area. If you smell gas, do not attempt to light. Go to the gas leak section below.
- Igniter battery (if your model has one) is fresh — many Hampton Bay and similar models use a single AA or AAA cell.
- You have read at least the lighting section of your model's owner's manual.
Essential safety reminders and required clearances
Patio heaters are safe appliances when used correctly, but the consequences of getting it wrong are serious. Propane is heavier than air, it pools at ground level, which means a slow leak can build up an invisible flammable layer before you notice it. Burn that into your habits: if you smell gas at any point before, during, or after lighting, shut the cylinder valve, move away from the heater, and ventilate the area for at least five minutes before doing anything else.
Clearance requirements matter more than most people assume. For freestanding propane mushroom-style heaters, keep the emitter head at least 3 feet from any overhead structure and at least 3 feet horizontally from walls, railings, and furniture. For wall-mounted and ceiling-mounted commercial units like Bromic Tungsten models, the manufacturer specifies a minimum floor-to-heater-bottom clearance of 8 feet (96 inches) for typical installations, this is a hard minimum, not a suggestion. Always check the clearance table in your specific model's manual. If you no longer have the manual, the section near the end of this guide explains how to look it up by model number.
- Never use a gas patio heater indoors, in a tent, or under a solid roof without professional ventilation assessment.
- Never store a spare propane cylinder under or directly beside a lit heater.
- Keep the heater at least 10 feet from any LP gas cylinder storage area.
- Do not operate a heater under an umbrella with less than 3 feet of clearance to the emitter.
- Children and pets must be kept away from the heater while it is operating and for 10 minutes after shutdown — the emitter screen stays hot.
- Never check for gas leaks with a lit match or open flame. Use soapy water only.
- Natural gas hard-wired units must be installed by a licensed gas technician. NFPA 54 (National Fuel Gas Code) and your local authority having jurisdiction (AHJ) govern this work — it is not a DIY installation job.
- Hard-wired electric units (like Bromic Tungsten Electric) require permanent wiring by a licensed electrician and must follow all torque values and wiring diagrams in the installation manual.
Tools, parts and supplies checklist
You do not need much for routine lighting, maintenance, and basic repairs. Having the right items on hand before you start saves repeated trips back inside. If you need a replacement or spare part urgently, consider a local option for patio heater pick up today to avoid delays.
- Adjustable wrench or open-end wrench set (for regulator connections and burner removal)
- Flathead and Phillips screwdrivers (for access panels, battery compartments, electrode screws)
- Needle or pin (for clearing pilot orifice — a straightened paper clip works)
- Small wire brush or old toothbrush (burner port cleaning)
- Compressed air can (blowing out venturi tubes and orifices)
- Dish soap and water in a small spray bottle or bowl (leak testing)
- Digital multimeter capable of millivolt DC range (thermocouple/thermopile testing)
- Replacement AA or AAA batteries (check your model — most Hampton Bay units use one AAA)
- Replacement thermocouple or thermopile matched to your model (have the model number ready)
- Replacement piezo igniter assembly or battery-powered ignition module if needed
- Thread sealant rated for gas connections (yellow PTFE tape or liquid sealant — never standard white plumber's tape)
Pre-lighting assembly and setup checks
Propane cylinder hookup and regulator
The regulator supplied with your heater is purpose-matched to that appliance. Most residential patio heater regulators are low-pressure units that reduce cylinder pressure down to approximately 11 inches water column (about 0.4 to 0.5 psi) at the outlet, this is the standard operating pressure for LP-gas appliances. Do not substitute a different regulator without confirming its outlet pressure matches your heater's specification. Thread the regulator onto the cylinder valve hand-tight first (propane fittings are left-hand thread, turn counterclockwise to tighten), then snug it with a wrench. Connect the hose to the heater's gas inlet and tighten that connection as well. Open the cylinder valve slowly, all the way, then back off a quarter-turn. Perform a soap-water leak test on every connection before attempting to light. For a complete patio heater setup checklist and step-by-step photos, see patio heater setup.
Hoses and valves
Inspect the hose before every season and any time you reconnect a cylinder. Look for cracks, kinks, abrasion, or any sign of animal chewing, rodents are a genuine hazard for hoses stored near the ground. A hose that shows cracking or feels stiff and brittle should be replaced before use. Many manufacturer manuals specify a maximum hose age (often 5 years from manufacture date, stamped on the hose). Make sure the hose is not routed near sharp edges or touching any part of the heater body that gets hot. The control valve on the heater should turn smoothly through its positions. If it is stiff, gritty, or sticky, do not force it, a damaged control valve needs replacement, not force.
Batteries and power
If your heater uses a battery-powered ignition module rather than a mechanical piezo button, the battery is one of the most common reasons for a no-spark complaint. The battery compartment is usually a small cap on the control knob assembly or on the side of the control panel. Unscrew or pop it open, remove the old battery, and fit a fresh one, noting polarity. Most Hampton Bay freestanding models use a single AA or AAA cell. After fitting the battery, press the igniter button while watching the electrode at the pilot assembly: you should see a visible blue-white spark jumping the gap. If you see and hear a click but no visible spark, the electrode gap may be fouled or out of alignment. If there is no click at all, the ignition module or wiring is the problem. Electric patio heaters should be plugged into a properly rated, outdoor-rated GFCI outlet. Check that the circuit breaker or GFCI has not tripped before assuming a fault with the heater itself.
Plain-English glossary: the five terms you need to know
The lighting and troubleshooting sections below use these five terms constantly. Read these definitions once and the rest of the guide will make much more sense. For a quick definition, see patio heater meaning for the basic explanation of what a patio heater is and how it works.
| Term | What it is | What it does |
|---|---|---|
| Pilot light | A small, continuously burning flame inside the burner assembly | Ignites the main burner when you turn up the heat; gives the thermocouple/thermopile something to heat up |
| Thermocouple | Two dissimilar metal wires welded at a tip, positioned in the pilot flame | Generates a small DC voltage (typically 20–30 mV when healthy) that signals the gas valve the pilot is lit and it is safe to keep the valve open |
| Thermopile | A series of thermocouples stacked together, also positioned in the pilot flame | Produces a higher millivolt output (roughly 250–750 mV) needed to power millivolt control valves, remote receivers, or thermostatic controls |
| Tilt switch / tip-over device | A small mechanical or electronic sensor inside the heater base or body | Cuts gas flow or power if the heater tilts beyond a safe angle, preventing fire if the unit is knocked over |
| Piezo igniter | A spring-loaded crystal mechanism — no battery needed | Generates a high-voltage spark mechanically when you press the button, used to ignite the pilot flame; found on many portable and mid-range heaters alongside or instead of battery-powered modules |
| Flame-failure device (FFD) | The collective name for the safety system (usually thermocouple or thermopile plus gas valve) that shuts off gas if the flame goes out | Prevents unburned gas from flowing after the pilot extinguishes — it is the reason you must hold the pilot knob for 30–60 seconds when lighting |
Step-by-step lighting: propane freestanding and tabletop heaters
This procedure covers the most common configuration, a mushroom-style freestanding or tabletop propane heater with a standing pilot, push-button igniter, and a single control knob. Mr. Heater Buddy/Big Buddy portables and Hampton Bay freestanding heaters both follow this basic sequence, though the exact knob positions and label colors vary slightly by model. Have your owner's manual nearby the first time through.
- Make sure the heater is upright and level on a stable surface outdoors. The tilt switch will not allow lighting if the unit is leaning.
- Open the propane cylinder valve fully, then back off a quarter-turn.
- Wait 30 seconds. This lets the regulator equalize and any residual gas from a previous shutdown to clear.
- Press the control knob in slightly to disengage the detent, then turn it counterclockwise (or as indicated on your model) to the PILOT position.
- Continue holding the knob fully depressed — this mechanically opens the pilot gas supply.
- While holding the knob down, press the igniter button repeatedly (or hold the piezo button) until you see and hear the pilot flame ignite. Look through the viewing window or down into the burner assembly. You should see a small blue flame at the pilot tip.
- Keep holding the control knob depressed for a full 30 to 60 seconds. This is not optional — the thermocouple needs this time to reach operating temperature and produce enough voltage (at least 18–20 mV) to hold the gas valve open. On some thermopile-based models you may need to hold up to 90 seconds.
- After holding, slowly release the knob. If the pilot stays lit, the thermocouple has engaged successfully. If it goes out, the most common cause is releasing too soon — start over and hold longer.
- Once the pilot is steady, turn the control knob from PILOT to your desired heat setting (LOW, MEDIUM, or HIGH). The main burner should ignite from the pilot flame within a few seconds.
- Adjust heat as needed. The pilot will remain lit whenever the heater is running, maintaining the FFD circuit.
If the pilot lights but the main burner fails to ignite when you turn to HIGH, the issue is usually downstream of the pilot, a clogged main burner orifice, obstructed venturi, or a regulator that is not delivering full pressure. The troubleshooting section covers this in detail.
Step-by-step lighting: natural-gas hard-wired patio heaters
Hard-piped natural gas heaters, wall-mounted units and ceiling-suspended commercial models being the most common, are permanently connected to your building's gas supply. The gas line, shut-off valve, and regulator are all fixed infrastructure. If any of that infrastructure was installed correctly by a licensed technician (as required by NFPA 54 and most local codes), lighting the heater itself is straightforward. See NFPA 54 / National Fuel Gas Code (scope and role), NFPA (code overview & references) for code requirements and installation guidance NFPA 54 / National Fuel Gas Code (scope and role) — NFPA (code overview & references). If you have any doubt about the installation, for example, you bought a house with a heater already installed and have never seen it work, have the installation inspected before following these steps.
- Locate the dedicated shut-off valve for the heater on the gas supply line. It should be within sight of the heater. Confirm it is in the OPEN (parallel to pipe) position.
- Check for any gas odor in the area. If you smell gas before opening any valve, stop here — see the gas leak section.
- On the heater's control panel, confirm the main power switch (if present) is OFF and the control knob is in the OFF position.
- Turn the control knob to PILOT, pressing it in as required to open the pilot gas supply. The procedure from this point is mechanically identical to propane units: depress, spark, hold for 30–60 seconds.
- If the heater uses electronic ignition (a wall switch or remote) rather than a manual piezo: turn the power switch to ON. The ignition module will automatically attempt to spark and light the pilot. Allow one full ignition cycle (typically 30–90 seconds) before assuming failure.
- Once the pilot is established, turn or select your desired heat setting. The main burner should light within a few seconds.
- On any remote-controlled or smart-thermostat-integrated unit, verify the remote receiver has power (usually a small LED indicator) and that the remote is within range before concluding the heater has failed.
A note on pressure: natural gas appliances run at a lower manifold pressure than propane (typically around 3.5 inches water column compared to propane's 11 inches water column). If a heater designed for propane is connected to natural gas without a conversion kit, or vice versa, it will either fail to light or burn dangerously. Never assume interchangeability between fuel types. The appliance rating plate will state the approved gas type.
Step-by-step lighting: electric and wall/ceiling units
Electric infrared patio heaters (including hard-wired units like the Bromic Tungsten Electric series) have no gas, no pilot, and no thermocouple. The lighting sequence is simply powering them on correctly and verifying nothing has tripped in the electrical system.
- Confirm the heater is mounted at the correct height and clearances as specified in the installation manual. For Bromic Tungsten Electric, this is a hard-wired permanent installation — it should only be operated after a licensed electrician has completed and verified the wiring.
- Check the circuit breaker for the heater's dedicated circuit. Reset if tripped, then investigate why it tripped before proceeding.
- If the heater is plug-in (smaller portable electric infrared units), plug into an outdoor-rated GFCI outlet. If the GFCI trips immediately on plugging in, there is likely a wiring fault inside the heater — do not reset and force it. Test on a known-good GFCI outlet first to rule out a faulty receptacle.
- For wall-switch-controlled units, flip the switch to ON. The heating elements should glow orange-red within 30–60 seconds. If there is no glow and no warmth after 90 seconds, the element or wiring may have failed.
- For remote-controlled or smart-app-controlled units, ensure the controller has fresh batteries, the receiver unit has power, and both are paired. Most systems have a pairing reset procedure documented in the manual — typically holding the pairing button for 5 seconds.
- If the unit has a thermal cutout or overheat reset button (usually a small red button on the body or wiring junction box), check whether it has tripped. Press firmly to reset, then retry power-on.
- Electric heaters with a tilt switch (common on portable electric units) will not power on if tipped. Stand the unit upright, wait 30 seconds, and retry.
Common ignition faults and simple fixes
Failed ignition, pressing the button and getting nothing, is the single most common complaint I hear about patio heaters. It almost always comes down to one of four things: no spark, spark but no gas at the pilot, gas at the pilot but spark missing the gap, or the system not holding after ignition. Here is how to work through them.
No spark at all
First check the battery if your model uses an electronic ignition module. A weak battery is the leading cause of no-spark complaints on Hampton Bay and similar models. Fit a fresh AA or AAA (check your manual for the correct type), then test again. If you still get no click and no spark, visually inspect the wire from the ignition module to the electrode, look for breaks, melted insulation from proximity to the burner, or a connector that has pulled off. A disconnected electrode wire is a common fault on older heaters. If the wire is intact and connected but the module produces no response when you press the button, the ignition module itself has failed and needs replacing.
Weak spark or spark missing the pilot
A visible spark that fails to light the pilot is usually a positioning problem. The electrode tip should be positioned about 3 to 5 mm from the pilot hood or target, and the spark should jump directly across the gas flow path. Bend the electrode gently with needle-nose pliers to correct the gap if it has been knocked out of position. If the spark looks faint or orange rather than crisp and blue-white, the electrode tip may be coated in carbon. Clean it carefully with fine sandpaper or a wire brush, then recheck the gap. On piezo-type igniters, a weak or degraded crystal produces a weak spark, the only fix is replacing the piezo assembly.
Spark present but pilot does not light
If you can see the spark jumping but the pilot flame never appears, the pilot is not getting gas. Check that the cylinder valve is open and the cylinder is not empty. Then check that you are holding the control knob fully depressed while sparking, partial depression restricts pilot gas flow on many valve designs. If gas flow is confirmed (you may smell a faint gas odor briefly at the pilot hood when you depress the knob), the pilot orifice is likely clogged. Propane burns clean but spider webs and debris can block the tiny pilot orifice completely. Turn off the gas, remove the pilot assembly if accessible, and clear the orifice with a pin or needle. Blow it clear with compressed air. Reassemble, leak test the pilot gas line, and retry.
Troubleshooting: won't stay lit, pilot problems, and thermocouple diagnosis
A pilot that lights but goes out the moment you release the control knob is almost always a thermocouple issue, either the thermocouple is not positioned correctly in the flame, has failed, or you did not hold the knob long enough. Work through this sequence before buying a replacement.
- Hold the control knob in PILOT for a longer time. Start with 60 seconds. Some thermopile-based systems need up to 90 seconds. Releasing after only 15–20 seconds is the most common reason for an immediate pilot dropout.
- Check thermocouple positioning. The thermocouple tip must be sitting inside the pilot flame, not beside it or above it. A properly positioned thermocouple tip should be surrounded and enveloped by the pilot flame. A blue pilot flame that does not reach the thermocouple tip produces insufficient heat and millivoltage to hold the gas valve open.
- Clean the thermocouple tip. Carbon and oxidation on the tip insulate it from the flame. Turn off the gas, let it cool, then lightly sand the tip with fine-grit sandpaper or rub with a clean cloth. Reposition and retry.
- Test the thermocouple with a multimeter. Set your meter to DC millivolts. Attach the probes to the thermocouple's connection terminals at the gas valve (or use the thermocouple lead connections). Light the pilot and hold it for 60 seconds, then take a reading. A healthy thermocouple in a standing-pilot system should produce 20–30 mV open-circuit. Below approximately 18 mV, the valve will not hold reliably — replacement is the right call. Thermopile assemblies used on millivolt-valve systems should produce 250–750 mV; below 150–200 mV, replace.
- If the thermocouple tests low or produces zero millivolts, replace it. Thermocouples are inexpensive (typically under $15) and replacing one is a straightforward repair covered in the repairs section below.
- If the thermocouple tests healthy but the pilot still drops out, the gas valve itself may be failing to hold. This is less common but does happen on older heaters. A gas valve replacement is within DIY scope on most freestanding propane heaters but requires care — see the professional callout section if you are uncertain.
Tilt/tilt-switch trips and stability checks
The tip-over safety device is a feature you want working, but it can also cause confusing no-light situations if the heater is on an uneven surface or if the switch has been triggered and not reset properly. Here is how to handle it.
On gas freestanding heaters, the tilt switch (usually a small mercury or ball-bearing mechanism inside the base) interrupts the safety circuit when the unit tilts beyond roughly 30 degrees. If the heater was tipped over, moved, or shipped on its side, the switch may need to reset. Stand the heater completely upright on a flat, level surface. Wait about 30 seconds. Then attempt lighting normally. Most gas tilt switches reset automatically once the heater is upright. If the heater is on a deck or surface that has any slope, even slight, try a completely flat surface first to rule out a marginal tilt issue.
On electric portable heaters, the tilt switch typically interrupts power to the heating element. The reset procedure is the same: stand upright, wait, retry. Some electric models require you to unplug, wait 60 seconds, and re-plug before the overheat/tilt reset circuit clears. Check your manual for the specific reset sequence. If the tilt switch is tripping repeatedly on a level surface, the switch itself may have failed in the open position or become misadjusted, inspect the switch and its mounting, and replace it if it is visibly damaged or sticks in the open position. A tilt switch that does not reset is a safety fault: do not bypass it or tape it in the closed position. A tilt switch that has failed open will prevent the heater from running; a switch deliberately bypassed creates a fire hazard.
Gas leak detection, immediate response, and how to perform a leak test
Any time you connect or disconnect a gas cylinder, reconnect a regulator or hose, or suspect a leak, perform a soap-and-water leak test on every connection before attempting to light. This is non-negotiable, it takes 90 seconds and it can save your life.
If you smell gas
Close the cylinder valve immediately by turning it clockwise. Do not try to find the leak first, do not press any igniter buttons, and do not operate any electrical switches (including light switches). Move away from the heater and the cylinder. Wait at least five minutes for the gas to disperse before returning to investigate. Hampton Bay manuals are explicit about this five-minute wait requirement and it applies to any accidental flame-out or unexpected gas release. If the smell persists or you believe gas has entered an enclosed space, leave the area and call your gas supplier or fire department.
How to perform a soap-water leak test
- Mix approximately 1 part liquid dish soap with 3 to 4 parts water in a small bottle or bowl. The solution should be thick enough to form bubbles easily.
- Open the cylinder valve slowly to pressurize the system. Do NOT light the heater — keep all controls in the OFF or PILOT position.
- Apply the soapy solution generously to every gas connection: the regulator-to-cylinder fitting, the hose-to-regulator connection, the hose-to-heater inlet connection, and any fittings or unions in the gas train.
- Watch for bubbles — specifically growing or continuous bubbles, not just foam from applying the solution. Even slow steady bubbles indicate a leak.
- If you find a leak at a threaded connection, close the cylinder valve, relieve pressure, disassemble and re-seal the connection with yellow PTFE gas-rated tape or liquid pipe sealant, and test again.
- If a leak appears at a hose, regulator, or valve body (not a threaded joint), the component must be replaced — you cannot seal a crack in a hose or a faulty regulator body.
- Once all connections pass the soapy water test with no bubbles over 30 seconds, the system is ready to light.
For hard-piped natural gas installations, larger pressure-hold tests are more appropriate, these involve pressurizing the pipe system and monitoring for pressure drop over time with a calibrated gauge. This type of testing falls under licensed-tradesperson scope and follows the requirements of NFPA 54 and your local gas codes. Do not attempt pressure testing of hard-piped systems as a DIY task.
Routine maintenance: cleaning burners, burner ports, and orifices
Most patio heater ignition and performance issues I have seen trace back to one root cause: dirt. Spiders love the warm, sheltered environment inside patio heater burner tubes and pilot assemblies. Dust, debris, and carbon deposits build up over a season. A quick clean at the start of each outdoor season and a check after extended storage prevents the majority of problems covered in this guide.
- Turn off all gas and electric supplies to the heater. Allow it to cool completely before touching any burner components.
- Remove the emitter screen or heat deflector if your model allows it (usually held by two or three screws). Note the assembly order for reassembly.
- Inspect the main burner ring or tube for spider webs, insect nests, debris, and rust. Use a small wire brush or toothbrush to clean the exterior of the burner ports (the small holes around the burner ring). Do not enlarge the holes — just clear any blockage.
- Direct a short blast of compressed air through the venturi tube (the air-intake tube that mixes air into the gas flow). Hold the can nozzle at the open end of the venturi and blow inward. Debris and spider webs inside the venturi tube are a very common cause of weak yellow flames and poor heating performance.
- Check the main burner orifice — the small brass or stainless fitting at the gas inlet to the burner. It should have a single clean hole in the center. If it is partially blocked, clear it with a pin. Never drill it out or use a metal tool aggressively — orifice size is precisely calibrated for the fuel type and heat output.
- Inspect the pilot assembly. Clean the pilot orifice with a pin and blow clear with compressed air. Clean the thermocouple tip as described in the troubleshooting section.
- Reassemble all components in reverse order, ensuring all panels and screens are secured before operating.
- Reconnect the gas supply, perform a leak test, and do a test lighting before considering maintenance complete.
Simple replacements and repairs: batteries, thermocouples, igniters, and regulators
Replacing the igniter battery
This is the easiest repair on the list. Locate the battery cap on the ignition button assembly or control panel, unscrew or twist it off, remove the old cell, and insert a new one with the correct polarity (positive terminal toward the contact spring on most designs). Most Hampton Bay freestanding models take a single AA or AAA cell. Screw the cap back on firmly, a loose cap causes intermittent ignition faults. Test spark before reconnecting gas.
Replacing a thermocouple
Close the gas supply and let the heater cool completely. Locate where the thermocouple tip enters the pilot flame holder (usually a small bracket) and where the other end connects to the gas valve, usually a threaded nut connection at the valve body. Unscrew the nut at the valve (typically 5/16 inch), then free the tip from its bracket by loosening the retaining screw or clip. Note the routing of the old thermocouple so you can route the replacement identically. Thread the new thermocouple nut onto the valve by hand first, then tighten to snug plus a quarter-turn only, overtightening damages the thermocouple tube. Position the tip centrally in the pilot flame path, securing it in the bracket. Reconnect gas, leak test, and follow the full 60-second hold procedure on first lighting. Confirm with a millivolt reading if you have a multimeter.
Replacing a piezo igniter or electronic ignition module
Mechanical piezo igniters are held in place by a retaining nut behind the control panel. Disconnect the high-voltage wire from the electrode, unscrew the retaining nut, and pull the old unit out. Thread in the replacement and reattach the wire. For battery-powered electronic modules, the replacement module usually plugs in with the same wire connectors, match the replacement to your model number to ensure compatibility. After replacement, test spark before reconnecting gas.
Replacing a regulator
Regulators degrade over time, typically 5 to 10 years of use depending on conditions. Signs of a failing regulator include weak heat output at HIGH setting, yellow or lazy flame, or a popping/surging main burner. Always replace with a regulator rated for the same outlet pressure (11 in. W.C. for propane freestanding heaters) and with the same inlet connection type. After fitting the new regulator and reconnecting the hose, perform a full leak test on all connections before lighting.
How to find model manuals, parts diagrams, and replacement parts
The model number and serial number on your heater unlock everything, the correct manual, the right parts, the exact component specs. See our patio heater size guide to choose the correct heater output and footprint for your space. If you need classification for shipping or customs, check the patio heater HS code before ordering parts. On most freestanding propane heaters, this information is on a sticker inside the base panel, on the back of the control column, or on the underside of the emitter head. On wall-mounted units, check the back panel or the wiring junction box cover. Write down both numbers before you start searching.
With those numbers in hand, search the manufacturer's website directly, most brands including Mr. Heater, Hampton Bay, and Bromic maintain downloadable PDF manuals for current and discontinued models. If the manufacturer's site does not have it, try searching the model number followed by 'manual PDF' or 'owner's manual.' Third-party manual repositories also host many out-of-print manuals. For parts, the model number is the key to ordering a compatible thermocouple, orifice, igniter module, or regulator from the manufacturer's parts division or from aftermarket suppliers. Avoid buying generic 'universal' parts for safety-critical components like thermocouples and gas valves, always match the part to your specific model.
When to stop and call a professional
Most of the faults in this guide are genuinely DIY-accessible. But there is a clear line between reasonable home repair and work that requires a licensed gas fitter or electrician. The following situations are on the professional side of that line, not because the work is technically complicated, but because the consequences of getting it wrong are severe.
- Any fault or smell of gas that you cannot locate and confirm clear with a soap-water test.
- A leak at the gas valve body, at the control valve, or at any component that is not a threaded joint (cracks, corroded fittings, damaged valve seats).
- Any initial installation of a natural gas hard-wired patio heater — NFPA 54 and virtually all local gas codes require this to be done by a licensed gas technician.
- Any permanent hard-wiring of an electric patio heater (like Bromic Tungsten Electric) — requires a licensed electrician and must follow the manufacturer's wiring diagrams and torque specifications.
- A gas valve or main control valve that moves stiffly, leaks at its body, or cannot be turned to OFF — these are safety-critical components on a live gas appliance.
- Any situation where the regulator outlet pressure requires measurement (e.g., repeated unexplained flame issues after replacing other components) — this requires a manometer and gas pressure measurement skills.
- Any heater showing signs of burn-back, external flame, or overheating beyond the emitter head.
- Carbon monoxide symptoms (headache, nausea, dizziness) in people near the heater — this is an emergency. Remove people, ventilate the space, and do not use the heater until a qualified technician has inspected it.
Quick reference: symptom, likely cause, first-step fix
| Symptom | Most likely cause | First-step fix |
|---|---|---|
| No spark when igniter pressed (battery model) | Dead or weak igniter battery | Replace AA/AAA battery in igniter cap |
| No spark (piezo model) | Fouled electrode tip or failed piezo crystal | Clean electrode tip; replace piezo assembly if no improvement |
| Spark present but pilot does not light | Clogged pilot orifice or control knob not fully depressed | Clear pilot orifice with pin; ensure knob is fully pressed in while sparking |
| Pilot lights but goes out when knob released | Thermocouple not heated long enough OR thermocouple faulty/mispositioned | Hold knob for full 60 seconds; reposition thermocouple tip into pilot flame; test mV output and replace if below 18 mV |
| Pilot stays lit but main burner won't light | Blocked main burner orifice or venturi, or regulator under-pressure | Clear venturi with compressed air; clear orifice with pin; inspect/replace regulator |
| Flame is yellow, lazy, or pulsing | Blocked venturi tube (partial obstruction) or low regulator pressure | Clear venturi; check cylinder level; inspect/replace regulator |
| Heater won't light at all — no gas or spark response | Tilt switch tripped | Place on level surface, wait 30 seconds, retry |
| Gas smell without visible leak at connections | Cracked hose, faulty regulator body, or damaged valve | Close cylinder valve; inspect hose visually; call a pro if fault not at a threaded joint |
| Electric heater does not heat up | Tripped GFCI, tripped circuit breaker, or failed heating element | Reset GFCI/breaker; test on alternate outlet; if element is cold after 90 seconds on a good circuit, element has failed |
| Heater shuts off randomly during use | Tilt switch marginal trip (uneven surface) or overheating cutout tripping | Level the surface; check clearances above emitter; clean emitter screen if clogged with debris |
| Regulator makes loud hissing when cylinder opened | Overfill protection device (OPD) on cylinder triggered by opening valve too fast | Close cylinder valve; wait 30 seconds; reopen slowly |
| Control knob difficult to turn or stuck | Damaged control valve — do not force | Close gas supply; call a pro or replace the control valve assembly |
FAQ
What primary manufacturer documents should I collect for each patio heater model I cover?
Owner’s manual, installation/installation & service manual, and parts list (exploded view). These documents give model‑specific lighting steps, clearances, mounting instructions, regulator/hose specifications, ignition type, battery type, pilot/thermocouple/thermopile specifications, tilt‑switch/reset procedure, and OEM troubleshooting/maintenance guidance. Source examples: Mr. Heater Portable Buddy manual, Hampton Bay Use & Care Guides, Bromic Tungsten Installation & Service manuals.
Which codes and standards must I reference for safety and installation requirements?
NFPA 54 (National Fuel Gas Code / ANSI Z223.1) for natural gas piping and appliance installation; NFPA 58 (Liquefied Petroleum Gas Code) for LP cylinders, regulators and storage; and local building/gas codes or Authority Having Jurisdiction (AHJ). For workplace guidance, reference OSHA 29 CFR 1910.110 as it cites NFPA 58.
What authoritative industry practice documents are helpful for piped or multi‑appliance systems?
World LPG Association good‑practice guides for LPG reticulated systems (pressure test, detector and purge guidance), and regional gas industry technical bulletins covering pressure testing, allowable test pressures, and leak‑testing procedures.
What technical data should I gather for diagnosing flame‑sensing parts (thermocouple/thermopile)?
Manufacturer thermocouple/thermopile specifications and recommended flame‑positioning; typical diagnostic millivolt ranges (thermocouple ≈20–30 mV open circuit; <18–20 mV often indicates failure; thermopile ≈250–750 mV). Sources: manufacturer manuals and HVAC troubleshooting articles (e.g., ACHR News, technical how‑to guides).
Which regulator, hose and pressure specs are essential to cite for propane models?
Final appliance/regulator outlet pressure (typical residential LP appliance ≈11 in. W.C.); regulator types (single‑stage vs two‑stage/changeover); hose and fitting types and approved torque/specs from manufacturer. Use regulator product specs and OEM manuals (Mr. Heater, Hampton Bay) to show correct values and connection procedures.
What ignition and control details must I confirm model‑by‑model?
Ignition type (piezo vs battery/electronic spark vs continuous pilot vs electric hard‑wired), battery size and location (AA/AAA/9V where used), pilot hold time recommended (typically 30–60 s), tilt/tip‑over switch behavior and reset procedure, and exact control‑knob sequencing for lighting. Obtain these from each model’s owner/installation manual.