
A patio heater is an outdoor appliance that generates and radiates heat into an open or semi-open space, letting you use a deck, patio, or garden comfortably when temperatures drop. California's appliance regulations define it specifically as an infrared gas space heater designed for warming outdoor areas, but the term has broadened to cover electric infrared panels, tube heaters, and freestanding propane mushroom-style units as well. If you own one, you already know the appliance can be stubborn: a pilot that won't stay lit, an igniter that clicks but does nothing, or a tilt switch that trips for no obvious reason. This guide covers all of it, from the definition and how these heaters actually work, to the components inside, setup, troubleshooting, sizing, and what to check before buying one locally today.
Patio Heater Meaning: Definition, Types, Setup & Repair

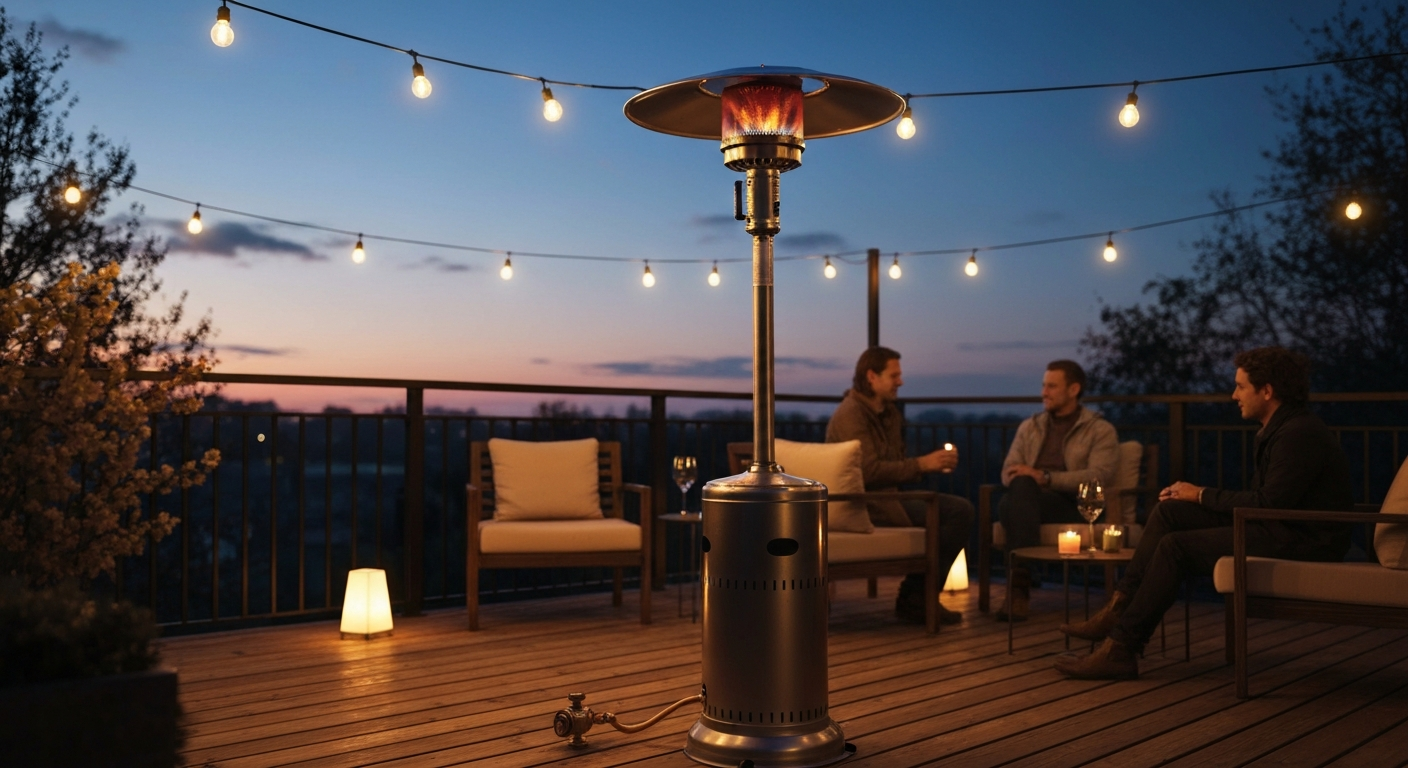
What 'patio heater' actually means
The California Code of Regulations (20 CCR §1602) defines a patio heater as an infrared gas space heater designed for warming outdoor areas. That is the narrowest regulatory definition, and it reflects the most common product in the market: a gas-fired unit that converts fuel into radiant heat and projects it outward rather than heating the air like a furnace. In broader use, the term covers any appliance built for outdoor warmth, including electric infrared panels, overhead tube heaters, and portable freestanding units with a propane cylinder in the base. What all of them share is that they are rated for outdoor use only, require specific clearances from combustibles, and are built around safety systems you need to understand to diagnose and maintain them.
Quick reference: types, common issues, and safety checklist
| Category | Details |
|---|---|
| Types | Freestanding propane (mushroom), fixed natural gas post-mount, wall/ceiling electric infrared panel, overhead tube heater |
| Fuel sources | LP/propane, natural gas (NG), 120V or 240V electric |
| Typical output | Propane/NG freestanding: 40,000–48,000 BTU; Electric infrared panels: 1–6 kW (3,400–20,500 BTU equivalent) |
| Key components | Regulator, gas control valve, pilot assembly, thermocouple/thermopile, ignition module, solenoid valve, burner, reflector |
| Common issues | Pilot won't light, pilot lights but won't stay lit, igniter clicks with no spark, tilt switch tripping, thermocouple/thermopile failure |
| Safety devices | Anti-tilt (tip-over) switch, flame-failure/flame-sensing device, pressure regulator, automatic solenoid shutoff valve |
| LP supply pressure | Minimum ~10–12 in. W.C.; maximum ≤14 in. W.C. (½ psig) |
| NG supply pressure | Minimum ~4–8 in. W.C.; maximum ≤14 in. W.C. |
| Leak test method | Soap solution (1:1 detergent:water) on fittings with gas on, controls off — watch for bubbles. Never use an open flame. |
| Clearance example | Bromic portable: 3.0 ft above emitter, 1.0 ft to sides — always follow your specific model's manual |
| Maintenance items | Clean burner ports and pilot orifice, wipe reflector, check hose condition, store LP cylinder outdoors or in ventilated area |
| Annual checks | Leak test all connections, inspect regulator and hose for cracks, verify tilt switch operation, confirm igniter battery |
How patio heaters actually work
Most patio heaters work through infrared radiation rather than convection. Instead of warming the air (which just blows away outdoors), they emit infrared energy that warms solid objects and people directly in the beam, the same way sunlight warms your skin on a cold day. Gas models do this by burning fuel at a burner assembly positioned below or behind a reflector. The reflector, usually polished stainless or aluminum, redirects that radiant energy downward or outward toward the people below. Electric infrared models use a resistive element (quartz, halogen, or carbon fiber tube) that glows and radiates heat in the same way, just without combustion.
The distinction that matters for troubleshooting is between pilot-and-thermocouple systems and direct-ignition systems. Most portable freestanding propane heaters use a standing pilot: you light a small pilot flame manually, hold it long enough to heat the thermocouple (the safety sensor), and the thermocouple's generated voltage tells the gas valve it is safe to stay open. Fixed natural gas models and some higher-end units use electronic direct-spark ignition with a thermopile instead, which generates more millivolts and can drive a powered valve. Electric models skip all of this, they are simply resistive loads controlled by a switch or thermostat.
The main types you'll encounter
Freestanding propane (mushroom-style)
These are the tall, umbrella-shaped heaters you see at restaurants and big-box stores. Common product form factors used across the industry include portable freestanding “mushroom” heaters (propane tank in base), fixed post‑mount units (bolted and hard‑plumbed to natural gas), wall/ceiling‑mounted infrared panels, and long overhead tube heaters portable freestanding “mushroom” heaters (propane tank in base), fixed post‑mount units, wall/ceiling‑mounted infrared panels, and long overhead tube heaters. A standard 20 lb propane cylinder sits in the base, a regulator and hose connect it to the burner at the top of the pole, and a domed reflector caps the whole unit. Most produce 40,000–48,000 BTU and heat roughly a 15–20 ft diameter circle. They are portable and need no permanent installation, but the tank must be stored outdoors or in a ventilated space, never indoors or in a closed garage.
Fixed natural gas post-mount
These are bolted to a deck or patio and hard-plumbed to a natural gas supply line. Installation requires a licensed plumber or gas fitter to run and connect the gas line per ANSI Z223.1 / NFPA 54 (the National Fuel Gas Code). Once installed they are essentially maintenance-free on the fuel-supply side, but the burner, pilot, and ignition components are the same as on portable models and fail in the same ways.
Wall and ceiling-mounted electric infrared
Electric infrared panels (like Bromic's Platinum Electric line) mount on a wall or ceiling bracket and plug into or wire directly to a 120V or 240V circuit. They have no combustion, no pilot, and no gas connections to leak. Troubleshooting is simpler: it usually comes down to the element, the thermostat, or the controller. The tradeoff is that operating costs are higher than gas in most areas, and you need a correctly rated circuit before you install one.
Overhead tube heaters
Tube heaters run a long radiant tube (typically 4–12 ft) across the ceiling of a covered patio or pergola. They produce an even band of heat along their length rather than a focused circle, which makes them well-suited for long, narrow spaces. Gas tube heaters require proper venting clearances and combustion-air considerations, the NFPA 54 standard applies here as it does with all gas appliances.
Key components you'll find in any patio heater manual
Before you open a manual or start diagnosing a problem, it helps to know the names of the parts and what each one does. Here is a rundown of what you will see in virtually every gas patio heater parts diagram.
- Regulator: Reduces the high tank or line pressure to a safe operating pressure. LP regulators on portable heaters commonly require a minimum inlet of ~11 in. W.C. and a maximum supply of ≤14 in. W.C. (½ psig). A failed regulator often mimics a clogged orifice — low flame, hard starting.
- Gas control / selector valve: The main manual valve you turn from Off to Pilot to High. It houses the solenoid coil that the thermocouple/thermopile must energize to hold the valve open.
- Pilot assembly: The small burner that stays lit continuously in standing-pilot systems, including the pilot orifice (easily clogged with spider webs or debris), venturi tube, and pilot hood.
- Thermocouple: A single metal probe that sits in the pilot flame and generates ~25–30 millivolts when heated. That voltage holds the safety solenoid open. If the flame goes out, voltage drops and the solenoid closes — cutting off gas. A failed thermocouple is one of the most common patio heater faults.
- Thermopile: A series of thermocouples packaged together, producing ~250–750 millivolts open-circuit. Used on systems that need more voltage to power a valve or remote control module. Below roughly 550 mV, many gas-control valves will not hold open — this is the first thing to measure when a pilot lights but the main burner will not come on.
- Ignition module / igniter: Either a battery-powered electronic igniter (AA or AAA cells) or a piezo crystal igniter that produces a spark at the pilot orifice. Dead batteries are the number one cause of click-but-no-ignition faults.
- Solenoid (safety shutoff) valve: An electromagnet-driven valve held open by the thermocouple/thermopile voltage. Cuts gas immediately when the flame fails.
- Burner assembly: The main heat-producing element, a ring or tube with ports that the gas flows through and burns at. Clogged ports cause uneven flame or low output.
- Reflector / emitter: The polished dome or panel above the burner that redirects radiant heat downward. Soot, oxidation, or dents reduce efficiency significantly.
- Hose assembly: Must be a Type-1 approved LP or NG-rated hose. Inspect for cracking, abrasion, or kinking at every seasonal startup.
- Anti-tilt (tip-over) switch: A safety device, usually a mercury or ball-bearing switch in the base, that cuts power or fuel if the heater tilts beyond a safe angle. A faulty tilt switch is a frequent cause of unexplained shutoff on freestanding heaters.
Setting up and lighting a patio heater for the first time
Whether you just bought a unit or you are getting one out of storage, take the setup steps in order. Rushing ahead to ignition before checking connections is how gas leaks happen. Detailed lighting instructions vary by brand, so consult your specific manual, but this sequence covers what every manufacturer requires. For step-by-step guidance and a pre-ignition checklist, see the patio heater setup guide. For step-by-step patio heater lighting instructions, consult your manufacturer's manual or refer to a dedicated patio heater lighting instructions guide for illustrated, model-specific steps. Manufacturer manuals note that hoses must be Type‑1 approved propane/natural‑gas hose assemblies and models include either a factory‑supplied regulator or require an approved regulator and manual shutoff valve per local codes (Bromic Tungsten Gas Heater Manual, gas supply, hose and regulator instructions) Bromic Tungsten Gas Heater Manual — gas supply, hose and regulator instructions.
- Choose your location: Place the heater on a stable, level surface at least 3 ft from any overhead obstruction and per your model's side-clearance spec. Bromic's portable manual, for example, requires 3.0 ft above the emitter. Check your specific manual for the exact numbers — they vary by model and BTU output.
- Inspect the hose and regulator: Before attaching the propane cylinder, run your hand along the full length of the hose. If you feel any cracks, hardening, or see abrasion damage, replace the hose before proceeding. Do not use a hose that has been stored kinked.
- Connect the fuel supply: For LP, thread the regulator fitting onto the tank valve hand-tight, then a quarter turn with a wrench. For NG, confirm the manual shutoff valve on the supply line is closed before connecting. Verify all other fittings on the heater are tight.
- Perform a leak test before every new connection: Mix equal parts liquid dish soap and water. Open the tank valve (or NG supply) slowly, leaving the heater controls in the Off position. Brush or spray the soap solution onto every fitting, the regulator, the hose ends, and any connection at the base of the pole. If you see bubbles, close the fuel supply immediately and tighten or replace the fitting. Never test for leaks with a flame.
- Check the igniter battery: If your model uses a battery-powered igniter, install fresh AA or AAA cells before your first lighting attempt. A weak battery is the most preventable reason a new heater fails to light on day one.
- Light the pilot: Turn the control knob to Pilot, depress the knob to bypass the solenoid, and press the igniter button. You should see a small blue pilot flame appear at the pilot orifice. Keep the knob depressed for 30–45 seconds while the thermocouple heats up — this is mandatory, not optional. If you release too early, the solenoid drops out and the pilot extinguishes.
- Test the tilt switch: On freestanding models, gently rock the heater slightly and confirm the pilot goes out when it tilts more than about 15 degrees. This verifies the safety device is functional before you put the heater into service.
- Turn to the desired heat setting: Once the pilot is established, turn the control knob from Pilot to the Low or High position. The main burner should ignite from the pilot within a few seconds. If it does not, go to the troubleshooting section below.
Diagnosing and fixing the most common problems
Most patio heater failures fall into five categories. Work through these in order before buying any parts, the fix is usually simpler and cheaper than the first suspected cause.
Igniter clicks but the pilot won't light
- Replace the igniter batteries first (AA or AAA, depending on model). This fixes the problem more than half the time.
- Confirm the tank has fuel and the valve is fully open.
- Press the control knob down fully while clicking — partial depression prevents gas from reaching the pilot orifice.
- Listen for a spark and look for a visible blue arc at the pilot tip. If there is no spark, the igniter wire may be disconnected or the electrode tip may be cracked. Inspect the wire from the module to the pilot for pinching or corrosion at the connector.
- If the spark is present but there is no ignition, check gas flow: slowly turn the control to High with a lit match held at the burner (outdoors, with confirmed leak-free connections) to verify gas is reaching the unit. No flow usually points to a failed regulator or a closed upstream valve.
- Check the pilot orifice for spider webs or debris. This is extremely common on heaters stored outdoors. Remove the orifice with a small wrench and clear it with compressed air — do not use a needle or wire, which can enlarge the orifice and affect flame geometry.
Pilot lights but goes out when you release the knob
This is almost always a thermocouple or thermopile issue. The pilot flame is not heating the sensor probe enough to generate the voltage needed to hold the solenoid open. Start by measuring the output voltage with a digital multimeter: clamp one lead to the thermocouple body and the other to the tip terminal at the gas valve. After holding the pilot for 60 seconds, a healthy single thermocouple should read approximately 25–30 mV; a healthy thermopile should read 250–750 mV. If a thermopile reads below roughly 550 mV, the valve coil may not hold in reliably, replace the thermopile before replacing the gas valve, since a new valve will have the same problem if the sensor is weak. Replacement thermocouples and thermopiles are widely available and cost $10–25. The swap involves unscrewing the probe from the pilot bracket and disconnecting the push-on terminal at the valve body, most people with basic hand tools can complete it in under 30 minutes. Also check that the probe tip sits directly in the pilot flame: if it has bent away or the pilot flame is blowing sideways, reposition it.
Heater shuts off unexpectedly during use
- Check the tilt switch first. On freestanding heaters, find the tilt switch assembly in the base (usually a small cylindrical component or a ball-bearing switch in a housing). Disconnect its wiring harness, and use a multimeter on continuity mode to confirm it closes when the heater is level. If it shows open continuity on a level surface, the switch is faulty — replace it. Tilt switch replacements are inexpensive and brand-specific; look up your model number to get the right part.
- If the tilt switch checks out, verify the LP cylinder is not running empty. A nearly-empty cylinder can supply enough pressure to light the pilot but not maintain the main burner under load.
- Inspect the regulator: if the heater runs briefly then shuts down, a regulator that has entered 'lock-up mode' (a common issue after overpressure events or if the tank valve is opened too fast) may be restricting flow. To reset: turn everything off, disconnect the regulator from the tank, wait 30 seconds, and reconnect slowly before relighting.
- Check for wind: strong gusts can blow out the pilot on freestanding heaters. Some models have a wind guard; repositioning the heater or adding a wind barrier solves this without any parts.
Main burner won't ignite even though pilot is established
- Confirm thermopile voltage is above the valve's hold-in threshold (typically ~550 mV minimum — check your gas control's spec).
- Inspect the main burner ports for clogging. Insects and debris frequently block the small holes, producing a very low or uneven flame that looks like a gas-flow problem. Remove the burner assembly, clear ports with compressed air, and reinstall.
- On heaters with a manual shutoff valve (separate from the control knob), verify it is fully open.
- If voltage and fuel supply are confirmed normal but the main valve still does not open, the gas control valve itself may have a failed solenoid coil. At this point, valve replacement is straightforward but you must match the valve exactly to the model. If you are uncomfortable working on the valve, this is a reasonable point to involve a qualified gas technician.
Electric infrared heater not working
- Confirm the circuit breaker has not tripped and the outlet or hard-wired circuit is live.
- Check the element visually — a burned-out quartz or halogen element is usually visible as a black spot or a broken filament inside the tube.
- On panel heaters with a remote or thermostat (like Bromic Platinum Electric), reset the controller per the manual before assuming the element has failed.
- If the element is confirmed dead, replacement elements are available from the manufacturer for most models and swap in with basic tools.
Safety best practices and a regular maintenance schedule
Patio heaters are safe appliances when maintained properly, but gas and outdoor conditions create real hazards if you skip the basics. Here is what I recommend building into your routine. For additional patio heater tips, see the full troubleshooting and maintenance guide for step-by-step checks and safety reminders.
Every time you reconnect a fuel supply
- Perform a soap-bubble leak test on every fitting before igniting. Use one part dish soap to one part water. Apply with a brush or spray bottle. Any bubble formation means a leak — do not proceed.
- Open the LP cylinder valve slowly (no more than one full turn) to avoid triggering regulator lock-up.
- Never use an open flame to test for leaks. This warning appears in every manufacturer manual and in the NFPA 54 standard for a reason.
Monthly during the season
- Wipe the reflector/emitter dome with a soft cloth. Soot and oxidation measurably reduce the radiated heat output.
- Inspect the hose for cracking, stiffening, or abrasion. Pay special attention to the ends where the hose meets the fittings — this is where cracks start.
- Clear any visible debris (leaves, spider webs, insects) from the pilot orifice and burner ports.
- Verify that the area around and above the heater meets the minimum clearances specified in your model's manual.
At the start and end of each season
- Replace igniter batteries. Fresh batteries at startup prevent the most common first-use failure.
- Inspect and test the tilt switch with a multimeter for correct operation.
- Check the regulator body for corrosion or damage. Regulators typically have a service life of 5–10 years depending on use and exposure.
- For LP models: remove the propane cylinder before indoor or enclosed storage. LP cylinders must be stored outdoors or in a well-ventilated space — never in a basement, garage, or shed with poor ventilation.
- Cover the heater or store it in a dry location. Dyna-Glo, AZ Patio Heaters, and other manufacturers all specify that moisture ingress is a primary cause of pilot orifice corrosion and premature ignition failure.
- Run through the full lighting procedure on the first start of each season even if the heater seemed fine when stored.
Buying and sizing: how to pick the right heater for your space
The single most common buying mistake is choosing a heater by price or looks and then discovering it cannot warm the intended area. Here is a straightforward sizing approach based on real-world BTU performance.
BTU and kW guidance
As a starting rule, plan for roughly 1,000 BTU per 10 square feet of open patio space in mild climates, scaling up significantly for exposed, windy, or colder locations. A standard 48,000 BTU freestanding propane heater handles approximately a 15–20 ft diameter circle under calm conditions. For covered patios where heat is partially retained, you can size down. Electric infrared panels are rated in kilowatts: 1 kW equals roughly 3,400 BTU, so a 3 kW panel produces about 10,200 BTU equivalent. Because electric infrared heats objects directly rather than warming air, they can feel effective at lower output numbers in sheltered spaces.
Portable vs fixed: which makes sense
| Factor | Portable (LP freestanding) | Fixed (NG post-mount or electric panel) |
|---|---|---|
| Installation cost | None — plug-and-play with LP tank | Moderate to high — requires gas line or dedicated circuit |
| Operating cost | Higher (LP per-tank cost) | Lower (NG or electricity, especially off-peak) |
| Flexibility | Move it anywhere; no permanent commitment | Fixed in place; best for established entertaining areas |
| Maintenance complexity | Medium — tank swaps, regulator care | Lower on fuel side; same burner/ignition maintenance |
| Output range | 40,000–48,000 BTU typical | Wide range; NG models up to 100,000+ BTU |
| Best for | Renters, occasional use, flexible layouts | Homeowners with a dedicated outdoor living area |
My recommendation: if you have a permanent deck or covered patio you use regularly, a fixed natural gas or hard-wired electric infrared panel pays for itself in fuel savings and convenience within a season or two. If you rent, move seasonally, or just want to heat a different spot each time, a portable LP unit is the practical choice. For detailed guidance on sizing a heater to your exact space, the patio heater size guide covers floor area, ceiling height, climate zone, and coverage calculations in full.
Buying locally today: what to check before you leave the store
If you need a heater today, most hardware chains and home improvement stores carry freestanding LP models in stock. Before you load it in the car, here is what I would check on the spot. If you need one immediately, search for patio heater pick up today to locate nearby stores with the model in stock and same-day pickup options.
- Confirm the box includes the owner's manual. You will need the manual for assembly, correct ignition sequence, and part numbers if anything fails. If the box has been opened, flip to the parts list and verify the regulator, hose, and igniter battery are still in the packaging.
- Ask about the return policy before you buy, especially on display or open-box units. A heater that will not ignite out of the box is not uncommon, and you want a clear path to exchange it.
- Check the regulator condition on any floor model. If the rubber diaphragm housing is cracked or the outlet fitting is corroded, that unit has been mishandled.
- If the store offers same-day local pickup on an online order, verify the unit is not a discontinued SKU before completing the purchase — spare parts (especially thermocouples and tilt switches) can be difficult to source for discontinued models.
- Ask if the store stocks replacement LP regulators, hoses, or thermocouple kits. Having a local parts source saves a lot of frustration in the first season of ownership.
A short note on HS codes and commercial classification
If you are importing patio heaters, ordering parts from overseas suppliers, or shipping units commercially, you will need the correct Harmonized System (HS) tariff code. Patio heaters are not classified under a single universal code, gas-fired outdoor heaters, electric infrared heaters, and their component parts each fall under different HS headings, and the correct code affects import duties, customs declarations, and compliance paperwork. Getting it wrong can delay a shipment or trigger a reclassification. For a full breakdown of the relevant HS codes by heater type and component, the patio heater HS code resource covers the classification detail you need.
FAQ
What is a 'patio heater' (clear, search-friendly definition)?
A patio heater is an outdoor heating appliance designed to warm exterior living spaces. In regulatory and manufacturer contexts it typically refers to infrared or convective gas or electric heaters intended for outdoor use only (for example, the California regulation and major manufacturers define patio heaters as infrared gas space heaters or outdoor heating appliances).
What are the main types of patio heaters and how do they work (simple, verifiable distinctions)?
Main types: 1) Propane (portable) — freestanding units with an LP cylinder in the base; they burn propane at a burner head and radiate heat via a reflector. 2) Natural gas (hard‑plumbed) — fixed or post‑mount heaters connected to building gas lines; same burner principle as propane but plumbed to NG. 3) Electric convective or infrared — hard‑wired or plug‑in elements that heat air (convective) or emit infrared radiation (panel/tube heaters) to warm people and surfaces. Manufacturers publish separate manuals and specs for gas vs electric models and list permitted mounting formats (portable, wall, ceiling, pole).
What components will I see in a patio heater manual or parts diagram?
Common components listed in manuals: regulator (in base or external), gas control/selector valve, pilot assembly (pilot orifice and venturi), thermocouple or thermopile (flame‑sensor), ignition module or piezo/battery igniter, solenoid (safety shutoff) valve, burner assembly, reflector/emitter, hoses and fittings (for LP). Manuals and parts diagrams from major manufacturers use these terms consistently.
Step‑by‑step setup and first lighting essentials for DIY homeowners
Essentials: 1) Read the specific model manual and follow manufacturer clearances/mounting. 2) Place heater on a level surface and secure if required. 3) For propane, install the cylinder per manual and ensure regulator is attached. 4) For natural gas, use a licensed plumber for permanent connections following ANSI/NFPA codes. 5) Perform a soap‑solution leak test on all gas fittings with gas ON and controls OFF (never use a flame). 6) Confirm ignition battery/piezo is present and functional. 7) Follow the manual’s lighting sequence (usually: open gas valve, actuate ignition to light pilot, hold control so thermocouple/thermopile warms, then open main burner). 8) Observe flame shape and stability; check for unusual odors or sounds.
Quick DIY checklist for installation and daily use
- Verify clearances and mounting height per manual. - Confirm fuel type and correct regulator/hose (Type‑1 for LP). - Leak test fittings with soap solution. - Check igniter batteries. - Inspect tilt‑switch and anti‑tip devices. - Store LP cylinders indoors only when empty and capped; use covers in off‑season. - Keep combustibles away from the heater and reflector.
Common troubleshooting steps when a patio heater fails to ignite or won’t stay lit
Stepwise checks: 1) Fuel: confirm tank valve is open (LP) or NG supply is present. 2) Leak check: spray soap solution on fittings and watch for bubbles. 3) Ignition: replace igniter batteries or test piezo. 4) Pilot: inspect and clean pilot orifice and venturi; ensure pilot flame properly envelops thermocouple/thermopile. 5) Flame sensing: measure thermocouple/thermopile voltage with a DVM after pilot is hot (thermocouple ~25–30 mV; thermopile hundreds of mV); compare to manufacturer thresholds — low readings suggest replacement. 6) Safety switches: verify tilt switch continuity and wiring. 7) If pilot lights but main burner won’t stay on, suspect weak thermopile, faulty gas valve/solenoid, or insufficient supply pressure.