
Building a patio heater is genuinely doable for a DIY homeowner, but only for certain types. An electric infrared heater can be safely assembled and mounted by anyone comfortable with basic wiring. A tabletop alcohol or gel heater takes about 30 minutes and zero special tools. A propane heater, however, is a different story: building a gas-fueled unit from raw components without certified parts and a licensed gas technician signing off is a serious code and safety violation in most jurisdictions. This guide gives you the full picture so you can build confidently where it makes sense, and stop at the right point where it doesn't.
How to Build a Patio Heater: DIY Plans, Parts, and Safety

Grant Mercer
18 Jul 2026
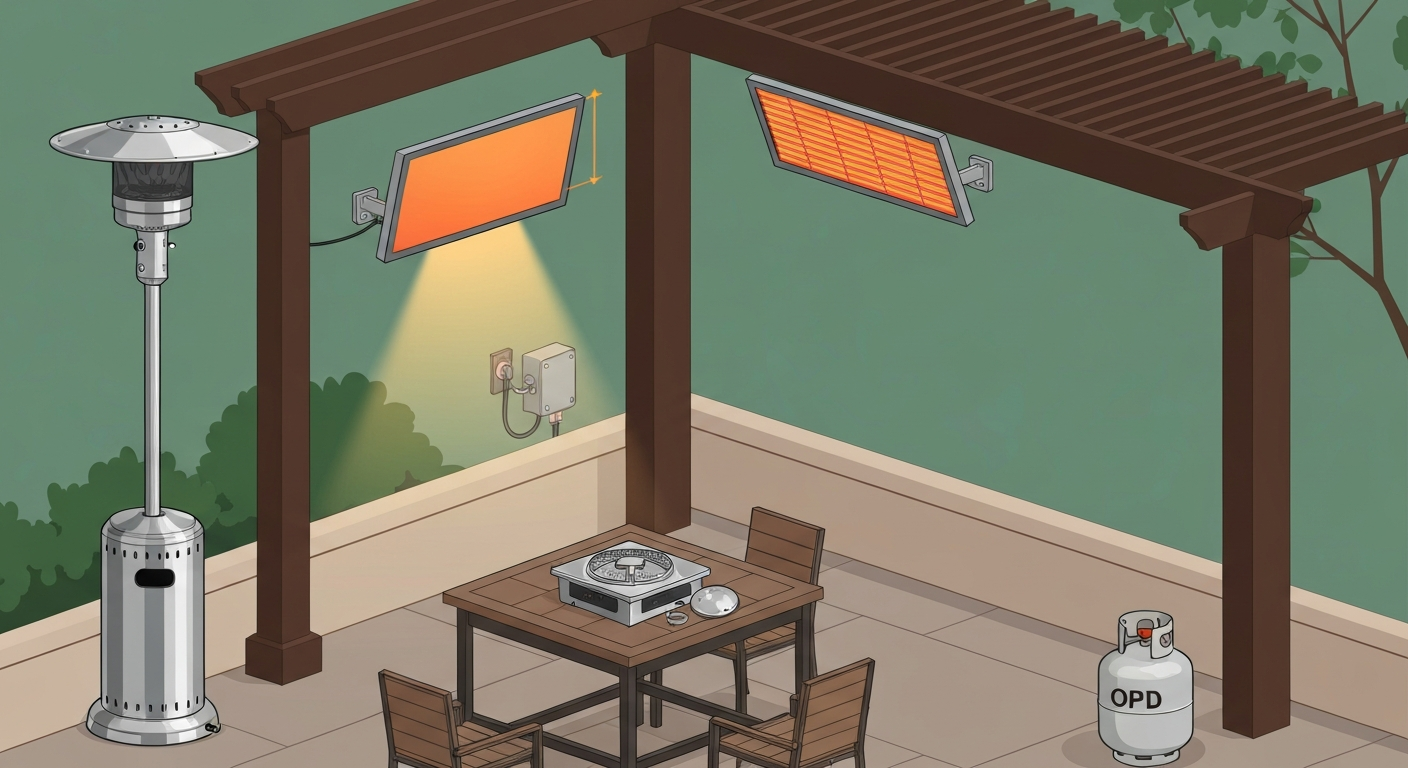
Who this guide is for and what you'll actually be building
This article is written for practical homeowners who want to heat an outdoor space without just buying a box-store unit off the shelf. Maybe you want a custom wall-mounted infrared heater sized exactly for your pergola. Maybe you're weighing a DIY gel-burner centerpiece for a small table. Or maybe you've found a propane heater kit online and want to know whether assembling it yourself is legal and safe. I'm going to walk through all three paths honestly, including the one where I tell you to hand the work to a licensed pro.
The practical DIY options covered in full build detail here are: electric infrared heaters (the safest and most flexible to build yourself), and tabletop alcohol or gel burners (simple, low-risk, no permits needed). For propane, I cover the correct approach of assembling a certified kit using listed components, because that's the only propane path that's both legal and safe for a non-licensed builder. Wood and biomass heaters are covered in context so you understand the trade-offs.
Build vs buy: when each choice actually makes sense
The honest answer is that buying a listed, certified patio heater is almost always cheaper, faster, and safer than building one from scratch. For guidance on selecting and purchasing a ready-made unit, see how to buy a patio heater. A decent freestanding propane mushroom heater costs $80 to $200. A quality wall-mounted electric infrared panel runs $150 to $600. These units are tested to UL 1278, ANSI Z83.26, or equivalent standards before they leave the factory. When you build, you are taking on the responsibility for that safety yourself.
That said, there are real reasons to build. You might need a custom form factor that doesn't exist off the shelf, like a flush-recessed ceiling infrared panel for a low pergola or a matching set of wall heaters for a long covered porch. You might want to learn the underlying technology so you can repair and maintain what you already own. Or you might want to assemble a propane heater from a certified kit because it gives you more control over the mounting hardware and layout than a pre-built unit.
| Factor | Build it yourself | Buy a listed unit |
|---|---|---|
| Upfront cost | $120–$600+ depending on type | $80–$800 for comparable output |
| Time required | 4–12 hours for electric; 30 min for gel/alcohol | 1–3 hours to unbox and install |
| Skill needed | Basic wiring (electric); none (gel); licensed tech (gas) | General DIY; gas may still need a pro for connection |
| Code compliance | Your responsibility; permit likely needed for fixed electric | Unit is pre-listed; installation still needs permit for fixed units |
| Liability | You own any failure | Manufacturer shares responsibility for defects |
| Repairability | You know every component | Depends on parts availability |
| Custom fit | Full control over size and placement | Limited to available models |
My general recommendation: if you want propane heat, buy a listed unit or use a certified kit with listed components and have a gas technician check the connections. If you want fixed electric infrared heat custom-sized to your space, building is a legitimate option. If you want something simple for a table or small corner, a gel or alcohol burner is a 30-minute project with no permits and no risk of gas leaks.
Types of patio heaters and how each one works
Understanding how each heater type actually moves heat will help you choose the right design for your space and build it correctly. For a concise overview of the basic operating principles, see how does a patio heater work. Patio heaters don't all work the same way, and that affects everything from where you mount them to how safe they are in wind.
Propane (gas-fired infrared)
A propane patio heater burns LP gas at a burner head, and the flame heats a ceramic or steel emitter that radiates infrared energy outward. The gas supply travels from a cylinder or fixed line through a pressure regulator (typically set to around 11 inches water column outlet pressure for low-pressure LP appliances), through a listed hose assembly, and into a control valve that manages gas flow and often incorporates a thermocouple safety circuit and tilt switch. The thermocouple sits in the pilot flame; if the pilot goes out, it cools within seconds, the voltage it generates drops, and the safety valve closes to cut gas flow. The tilt switch does the same job if the unit tips over. These are not optional features. ANSI/CSA Z83.26 (the governing North American standard for gas-fired outdoor infrared patio heaters) mandates both safety controls on qualifying units.
Electric infrared
Electric infrared heaters use a resistive element, either a quartz tube, carbon fiber filament, or ceramic panel, that gets hot enough to emit infrared radiation directly at people and surfaces rather than warming the air. This makes them highly efficient outdoors because wind doesn't carry the heat away. You run power from a dedicated circuit to the heater, which has no moving parts, no combustion, no gas supply, and no pilot. This simplicity is exactly why it's the most practical type to build yourself.
Tabletop alcohol and gel burners
These burn denatured alcohol or bio-ethanol gel in an open or semi-enclosed burner cup. The heat output is modest, typically 2,000 to 6,000 BTU/hr, which is enough to warm the air immediately around a small table but not enough to heat a large patio. They require no gas lines, no electrical connections, and no permits. The fuel is sold at hardware stores and home-goods retailers. The main risks are spills during refueling and placing the burner too close to overhead or adjacent flammable materials.
Wood and biomass heaters
Wood-burning chimineas and fire pits produce radiant and convective heat by combusting solid fuel. They're appealing for atmosphere but are inefficient as primary heating, require a clean dry fuel supply, produce smoke, and are subject to local burn bans. Many municipalities prohibit wood-burning appliances in certain zones or on days with poor air quality. They are not suitable for covered patios or enclosures due to smoke and ember risk. I won't build out a full construction guide for wood burners here because a properly built chiminea is really a masonry or metal fabrication project, not an appliance assembly, and it carries different permitting requirements than gas or electric heaters.
Design trade-offs: what actually matters before you build
| Criteria | Propane (gas-fired) | Electric infrared | Alcohol/gel tabletop | Wood/biomass |
|---|---|---|---|---|
| Heat output | 30,000–50,000 BTU/hr typical | 1,000–6,000W (3,400–20,500 BTU/hr) | 2,000–6,000 BTU/hr | Variable; hard to control |
| Effective range | Up to 6–9 ft radius | Up to 8 ft directional; ~2.5 m radiant reach for quality units | 2–4 ft around burner | 4–8 ft with line-of-sight |
| Fuel availability | LP cylinders widely available | Grid electricity | Hardware/home stores | Firewood/pellets locally |
| Runtime per fill/charge | 8–10 hrs on 20-lb cylinder | Continuous (grid-tied) | 2–5 hrs per fill | 1–3 hrs per load |
| Upfront cost (DIY build) | $200–$500 (certified kit) | $120–$400 | $30–$80 | $100–$400 |
| Portability | High (freestanding cylinder) | Low–medium (wall/ceiling mount) | High | Low–medium (heavy) |
| Permit required | Often yes (fixed installations) | Yes for fixed 240V circuits | No | Often yes (burn permits) |
| Maintenance effort | Medium (thermocouple, regulator, burner cleaning) | Low (element replacement every few years) | Low (clean burner cup) | High (ash, cleaning, chimney) |
| Wind sensitivity | High (flame can extinguish) | Low (no flame) | High | High |
For most covered patios, electric infrared wins on every dimension except fuel-independence. For more tips, see our guide on how to keep patio warm in winter. If your patio lacks a covered roof or you need to heat an open area in a power outage, a propane unit with a certified kit makes more sense. Gel burners are better treated as supplemental mood-heat for a dining table than as a primary heating strategy.
Safety, codes and permits: what you're legally required to follow
This section is not optional reading. Code compliance isn't bureaucratic box-ticking. It's the difference between a safe installation and one that can injure someone, void your homeowner's insurance, or result in a stop-work order or required teardown.
Gas safety and the applicable standards
ANSI/CSA Z83.26 (currently the 2020 edition, also designated CSA 2.37:20) is the primary North American standard for gas-fired outdoor infrared patio heaters. It covers suspended, wall-mounted, floor-standing, and tabletop units and sets maximum input ratings, required safety controls, permitted cylinder sizes, and regulated outlet pressure limits. In the 2020 edition, tabletop input limits and field conversion kit guidance were updated from earlier versions, so check the current edition if you're referencing spec sheets from older units.
The National Fuel Gas Code (NFPA 54 / ANSI Z223.1, 2024 edition) governs fuel-gas piping and appliance connections. For portable outdoor appliances, it references ANSI Z21.54 / CSA 8.4, which is the standard specifically for gas hose connectors used with portable outdoor gas-fired appliances. This means the hose running from a propane cylinder to a patio heater must be a listed assembly certified to ANSI Z21.54. A generic rubber hose from the hardware store is not a substitute.
Propane cylinders used with outdoor appliances in the U.S. are required to have an Overfill Prevention Device (OPD). Modern 20-lb DOT cylinders have OPD valves as standard, identifiable by the triangular handwheel. If you have an older cylinder without an OPD, replace it. Some adapter connections behave differently with OPD valves, particularly during initial purging, so check your regulator and hose assembly for OPD compatibility notes.
Electrical code requirements
Fixed electric infrared heaters are governed by NFPA 70 (the National Electrical Code). The most important rule for sizing your circuit is the continuous load factor: NEC Section 210.19 requires that branch-circuit conductors and overcurrent protective devices be sized at 125% of the continuous load for any load that runs three hours or more. So a 2,000W (about 8.3A at 240V) heater treated as a continuous load needs a circuit and breaker sized for at least 10.4A, which in practice means a 15A or 20A breaker with appropriately rated wire. For 240V heaters, a dedicated double-pole breaker and two-wire-plus-ground circuit are required.
Electric patio heaters should be listed to UL 1278 (the recognized U.S. standard for movable and wall- or ceiling-hung electric room heaters). When buying components or heater elements, confirm they carry a UL, ETL, or equivalent listing mark. The CPSC references these listings in its safety guidance for electric heaters. A homemade element with no listing is an insurance and fire-marshal problem waiting to happen.
Clearances, permits and the authority having jurisdiction
blank" rel="noopener noreferrer">NFPA 1 (Fire Code) and NFPA's outdoor heater safety guidance both state that installations of portable outdoor appliances and any modifications are subject to the authority having jurisdiction (AHJ), meaning your local building or fire department. Fixed or permanent installations almost always require a permit. Some jurisdictions require a permit even for hardwired wall-mounted electric heaters. Call your local building department before you start any permanent installation. It's a five-minute call that can save a lot of pain.
- Minimum clearance to combustibles: follow the listed appliance manual; typical overhead clearances are 24–36 inches for electric infrared, more for gas units
- Side clearances: most manufacturers specify at least 12–18 inches from walls and overhead structures for gas models
- Mounting height: Bromic specifies approximately 2.4 m (7.9 ft) bottom-of-heater height for some gas models; Heatscope electric models specify a minimum of approximately 82.7 in (210 cm) for certain products
- Wind exposure: gas heaters with pilot flames can extinguish in sustained winds above about 10–12 mph; site selection matters
- Covered patios or enclosed spaces: never use gas or alcohol heaters in fully enclosed or poorly ventilated spaces; CO accumulation is fatal
Parts, certified components and tools you'll need
The parts list varies significantly by build type. Below I've broken out what you need for each path, with emphasis on which components must be certified and where substitution is not acceptable.
Universal tools for any build
- Tape measure and pencil
- Stud finder
- Power drill and masonry or wood bit set
- Level (24-inch minimum)
- Screwdriver set (Phillips and flathead)
- Adjustable wrench and open-end wrench set
- Wire stripper and crimper (electric builds)
- Multimeter (electric builds)
- Pipe thread sealant rated for LP gas (gas builds only; never use regular plumber's tape on gas)
- Leak-check solution or soapy water (gas builds)
- Voltage tester (electric builds)
Gas-specific certified components (propane kit assembly)
Every gas-path component that contacts fuel must be listed and certified. There are no exceptions. Using uncertified parts on a gas appliance is a safety violation and will void any insurance coverage if there's a fire or injury.
- Certified burner head and emitter assembly (CSA/ANSI Z83.26 listed; buy as a matched kit)
- Listed LP pressure regulator: typically set to 11 in. water column (w.c.) outlet pressure for low-pressure LP appliances; two-stage regulators are recommended where inlet pressure varies or multiple appliances share a supply (brands like Maxitrol sell CSA/UL-listed regulators with rated outlet pressures and BTU capacity data)
- Listed hose assembly: must be certified to ANSI Z21.54 / CSA 8.4; typical lengths are 3–5 ft for cylinder-mounted units; check that the assembly is rated for LP (not just natural gas)
- Control valve assembly with integrated thermocouple seat and tilt switch (must come as a listed assembly from the kit manufacturer)
- Thermocouple: 24–36 inch millivolt thermocouple rated for the valve; replace only with OEM or equivalent listed part
- OPD-equipped DOT-approved propane cylinder (for cylinder-supplied units; 20 lb is standard)
- Cylinder mounting bracket or base (must secure cylinder from tipping)
Electric infrared specific components
- UL 1278 or ETL-listed infrared heating element (quartz, carbon fiber, or ceramic; wattage matched to your circuit)
- Weatherproof aluminum or stainless steel housing (minimum IP44 rating for outdoor use; IP65 preferred for exposed installations)
- Mounting bracket with adjustable angle (powder-coated steel or stainless)
- Weatherproof junction box (rated for outdoor wet locations)
- GFCI protection (required by NEC for outdoor receptacles and recommended for hardwired outdoor heaters)
- Correctly rated wire: for a 240V circuit, THWN-2 or equivalent outdoor-rated wire in appropriate gauge for the load plus 125% continuous-load factor
- Weatherproof conduit or approved cable management
- Dedicated double-pole circuit breaker sized per NEC 210.19
Alcohol/gel tabletop components
- Stainless steel or tempered-glass burner vessel (dedicated ethanol fireplace insert or tabletop burner; do not improvise with non-rated containers)
- Bio-ethanol fuel or denatured alcohol (rated for indoor/outdoor fireplace use)
- Snuffer tool or lid to extinguish the flame (required; never blow out an ethanol flame)
- Heat-resistant base or trivet rated for outdoor use
- Optional: decorative surround or fire-glass media (tempered glass only)
Estimated costs by build path
| Component | Electric infrared build | Propane certified kit | Alcohol/gel tabletop |
|---|---|---|---|
| Heater element / burner assembly | $60–$180 (listed element) | $80–$200 (kit with burner + emitter) | $20–$50 (burner insert) |
| Housing / enclosure | $30–$80 (aluminum enclosure) | Included in most kits | Included or $15–$40 |
| Mounting hardware | $15–$40 | $20–$50 (pole/bracket hardware) | $5–$15 (trivet/base) |
| Regulator (gas only) | N/A | $25–$70 (listed LP regulator) | N/A |
| Listed hose / connector (gas only) | N/A | $15–$35 (ANSI Z21.54 listed hose) | N/A |
| Wiring / conduit / breaker (electric) | $40–$120 (materials only) | N/A | N/A |
| Weatherproof junction box / GFCI | $15–$30 | N/A | N/A |
| Fuel for first use | $0 (grid power) | $15–$25 (20-lb LP cylinder) | $8–$20 (1L bio-ethanol) |
| Permit (if required) | $50–$150 typical | $50–$150 typical | None |
| Total estimated range | $210–$600+ | $205–$530+ | $48–$125 |
These ranges assume you already own basic tools. Electrician labor, if you hire out the circuit work, typically adds $100–$300 depending on your location and whether the panel work is straightforward. For propane, a licensed gas technician to inspect and sign off on connections adds $75–$200. Both are worth it.
Build path A: electric infrared patio heater (full step-by-step)
This is the build I'd recommend to most DIY homeowners. For detailed, step-by-step wiring and mounting instructions, see how to install patio heater. You're assembling a listed heating element into a weatherproof housing, mounting it securely, and wiring it to a dedicated circuit. Every component is replaceable, the system has no combustion risk, and wind has no effect on performance. The total job takes four to eight hours depending on how far you're running the circuit.
Step 1: size your heater for the space
A rough rule for outdoor infrared heating is 10 watts per square foot of patio area for mild climates, up to 15–20 watts per square foot for colder regions. For a 120 square foot covered porch in a temperate climate, you'd target 1,200 to 1,800W. Quality commercial infrared units like those from Bromic or Heatscope publish 'heat bloom' or heat footprint diagrams showing effective coverage by model and mounting height, and those are the most reliable sizing references. A single 2,000W element mounted at 8 feet covers roughly 8 to 10 feet of patio width with good directional focus. For larger spaces, plan on multiple elements rather than one oversized unit.
Step 2: choose and confirm your element
Buy a UL 1278 or ETL-listed infrared heating element matched to your voltage (120V or 240V) and wattage target. Carbon fiber and quartz tube elements produce immediate, visible infrared heat. Ceramic elements take longer to warm up but distribute heat more evenly. Check the IP rating: you want at least IP44 for a covered patio; IP65 if the heater will be exposed to rain. Confirm the element's listed wattage and voltage before ordering any other electrical components.
Step 3: plan the circuit and get your permit
A hardwired outdoor heater almost always requires a permit, and for 240V circuits, you should seriously consider hiring a licensed electrician for the panel work even if you handle the mounting and conduit run yourself. For a focused step-by-step walkthrough on how to set up a patio heater, see our guide on how to set up a patio heater. Apply NEC 210.19 sizing: multiply your heater's amperage by 1.25 (the continuous-load factor) to find the minimum breaker and wire rating. A 2,000W / 240V heater draws 8.33A; multiplied by 1.25 = 10.4A, so a 15A double-pole breaker with 14 AWG wire (minimum) is the code-compliant choice, though 20A with 12 AWG gives you headroom. GFCI protection is strongly recommended for all outdoor hardwired heaters. Mark your circuit run on a sketch before you buy wire.
Step 4: prepare the mounting location
Locate a structural member: a ceiling joist, rafter, or wall stud. Infrared heaters mounted to drywall anchors alone will eventually fail under the vibration and thermal cycling. Aim for a bottom-of-heater height of 7.5 to 8.5 feet (roughly 230 to 260 cm) for a standard 8-foot ceiling covered patio, angled 30 to 45 degrees downward toward the primary seating area. Check clearances: most listed elements require at least 24 inches of clearance to the nearest combustible surface above and 12 inches to the sides. Mark the mounting hole positions, drill pilot holes, and install the mounting bracket firmly into the structural member with appropriate lag screws.
Step 5: run the conduit and wire
Run outdoor-rated conduit (PVC schedule 40 or liquid-tight flexible metal conduit at the heater end) from your weatherproof junction box at the heater location back to the point where you'll connect to the dedicated circuit. Pull your THWN-2 or equivalent outdoor-rated wire through the conduit, leaving at least 6 inches of wire at each end for connections. Keep the wire continuous if possible; if you need a splice, use a properly rated weatherproof junction box. At the heater end, terminate in the weatherproof outdoor junction box mounted near the bracket.
Step 6: assemble the housing and element
Follow the element manufacturer's assembly instructions exactly. The housing typically consists of a reflector back plate, the element itself, and a wire guard or glass cover. Secure the element mounting tabs as specified; do not overtighten, as quartz and ceramic elements can crack under mechanical stress. Connect the element leads to the terminal block inside the housing using the wire gauge and connection type specified in the instructions. If the element has a ground lug, connect the ground wire.
Step 7: make electrical connections
With the breaker off and confirmed dead with your voltage tester, connect the circuit wires to the heater terminal block: line (hot) to line, neutral to neutral (if 120V), and ground to ground. For 240V two-wire-plus-ground systems, connect both hot legs to the line terminals and the ground wire to the ground lug. Tighten terminal screws to the torque specified in the heater instructions (typically 20–35 in-lb for most terminal blocks). Seal the junction box and conduit entry points with appropriate weatherproof fittings.
Step 8: grounding check and commissioning
Before energizing, use a multimeter to confirm continuity between the heater's ground lug, the grounding wire, and the panel ground. Confirm there is no continuity between any line terminal and the heater housing or ground (which would indicate a wiring fault). Then restore power at the breaker and test the heater. It should begin producing heat within 30 to 60 seconds. Check for any unusual smell (burning dust on first use is normal for a minute or two), any sparking, or any tripped GFCI or breaker. If the breaker trips immediately, shut off and recheck your connections.
Commissioning checklist
- Confirm mounting bracket is secured to structural member with rated fasteners
- Confirm heater is level or set to the intended angle with angle lock tightened
- Confirm all clearances meet manufacturer minimums (measure and record)
- Confirm ground continuity from heater housing to panel ground with multimeter
- Confirm no line-to-ground or line-to-housing shorts before energizing
- Confirm GFCI protection is present and test button functions
- Energize and confirm heater produces heat within 60 seconds
- Confirm breaker does not trip under full load for at least 5 minutes
- Confirm no smoke, burning smell beyond brief first-use dust burn, or sparking
- If permit was obtained, schedule inspection before closing any wall or ceiling penetrations
Build path B: tabletop alcohol or gel burner (quick build)
Buy a dedicated stainless steel bio-ethanol tabletop burner insert (not an improvised container) rated for outdoor use. Set it in a heat-resistant surround on a stable, non-combustible surface at least 24 inches from any overhead structure, awning, or umbrella. Fill the burner only when it is completely cold and only up to the fill line marked on the insert, typically 70 to 80% capacity. Use a long-reach lighter to ignite from a safe distance. Extinguish the flame with the snuffer tool or sliding cover; never blow it out, pour water on it, or move it while burning. Refuel only after the burner has cooled completely, at least 15 minutes after extinguishing. That's the whole build. The simplicity is also the appeal.
Assembling a propane heater with a certified kit
I want to be direct here: if you are sourcing raw burner components, welding together a housing, and assembling your own gas train from uncertified parts, you are building an unlisted gas appliance. This is not legal for residential use in the U.S. or Canada, it will void your homeowner's insurance, and it is genuinely dangerous. The right propane DIY path is to purchase a certified patio heater kit, meaning a kit where the burner assembly, control valve, thermocouple, and emitter come as a listed assembly (check for CSA or UL markings on the kit documentation), and then assemble it per the manufacturer's instructions using listed hose and regulator components.
Assembly of a certified kit follows the manufacturer's instruction sheet step by step. The critical connection points are: the regulator to the cylinder (hand-tighten plus one quarter turn with a wrench, then leak test), the hose from the regulator to the control valve (thread per the fitting type, apply LP-rated thread sealant only on NPT fittings, never on flare fittings), and the thermocouple to the valve seat (finger-tight plus a quarter turn, no sealant). After assembly, perform a thorough leak test: open the cylinder valve slowly, apply leak-check solution or soapy water to every connection, and watch for bubbles. Any bubble formation at any connection means shut off the cylinder immediately and recheck that joint. Do not test with a flame.
The tilt switch and thermocouple are the two most common failure points on a propane heater that won't stay lit or won't ignite. If the heater lights but goes out within 30 to 90 seconds, the thermocouple is almost always the culprit: it hasn't heated enough to hold the safety valve open. Holding the control knob in the pilot position for a full 30 to 45 seconds before releasing gives the thermocouple time to reach operating temperature. If the problem persists, the thermocouple likely needs replacement. These are standard repair topics that come up constantly in patio heater maintenance.
Placement, sizing and mounting: getting the most heat where you need it
Placement is where most DIY patio heaters underperform. For additional tips on layout, supplemental heat sources, and quick-win strategies, see our practical guide on how to warm up outdoor patio. Even a well-built heater loses most of its effectiveness if it's aimed wrong, mounted too high, or fighting a wind exposure it can't handle. For overhead infrared (electric or gas), mount the heater so it aims at the primary seating zone, not straight down. An angle of 30 to 45 degrees from vertical toward the seated occupants gives the best coverage. For a dining table, a single centered overhead unit works well. For a long sectional sofa, consider two smaller heaters spaced evenly rather than one large central unit.
Coverage estimates from manufacturers, like the heat bloom diagrams Bromic and Heatscope publish, are measured under controlled conditions. In real outdoor use with any wind, reduce the effective radius by 20 to 30 percent for gas, and by about 10 percent for electric. If your patio is exposed to regular winds, electric infrared is the significantly better choice because it delivers radiant heat directly to people regardless of air movement.
Routine maintenance to keep your build running well
Electric infrared heaters are the lowest-maintenance option. Clean the reflector and guard annually with a damp cloth (heater off and cool). Check the wire connections at the terminal block every two years for corrosion or loosening, especially in coastal or humid climates. The heating element itself typically lasts three to five years under regular use; quartz elements can crack if cold water hits them while hot, so don't hose down the heater while it's operating.
Propane heaters need more attention. At the start of each season: inspect the hose assembly for cracks, brittleness, or abrasion and replace it if there's any doubt (ANSI Z21.54 listed hoses should be replaced every five years regardless of visible condition); check the burner and emitter for spider webs and debris (a blocked burner orifice is a leading cause of ignition failure); clean the thermocouple tip with fine steel wool to remove oxidation deposits; test the tilt switch by gently tilting the unit while lit to confirm it shuts off gas flow. If the tilt switch doesn't cut gas when the unit is tilted past about 30 degrees, replace it immediately.
When to stop and call a licensed professional
DIY has real limits with heating appliances. Call a licensed gas technician if: you smell gas and can't identify the source after a thorough leak test; you're connecting to a fixed natural gas or LP line rather than a portable cylinder; you want to install a fixed gas line for the heater; or any gas component shows corrosion, damage, or thread damage that prevents a proper seal. Call a licensed electrician if: you need to add or modify a panel circuit; you're working with aluminum wiring in an older home; or your conduit run involves wet-location penetrations you're not confident sealing properly. The cost of a professional check is always less than the cost of a fire or an injury.
If you're troubleshooting a heater that won't light, won't stay lit, has tilt-switch issues, or is showing thermocouple symptoms, those are repair and maintenance topics worth digging into specifically. The diagnostic approach for a failed ignition is different from a heater that lights but won't hold flame, and both are different from a tilt switch that's triggering incorrectly. Understanding the system you've built, whether it's your own assembly or a purchased unit you're maintaining, makes all of those fixes straightforward.
FAQ
What primary technical and regulatory standards must I reference to write a safe, accurate DIY patio heater article for North American homeowners?
Cite ANSI/CSA Z83.26 (CSA 2.37) for gas-fired outdoor infrared patio heaters (installation types, input limits, tabletop restrictions, and field-conversion rules). Reference NFPA 54 / ANSI Z223.1 (National Fuel Gas Code) for piping, connectors, and appliance connection rules, plus NFPA 1 and NFPA guidance on outdoor heater/fire safety for permitting and AHJ (authority having jurisdiction) considerations. For electric heaters, cite the National Electrical Code (NFPA 70 / NEC) — especially continuous-load sizing rules (125% factor) — and UL 1278 (movable and wall/ceiling electric heaters) for listing/test requirements. Where applicable, quote the current edition numbers and note that numeric limits (pressures, input ratings, clearances) must come from the actual standard text or manufacturer manuals.
Which manufacturer and product documents are authoritative for model-specific clearances, mounting heights, and heat coverage?
Manufacturer installation and service manuals (e.g., Bromic, Heatscope and similar brands) are the authoritative sources for per-model minimum mounting heights, required clearances, IP/weather ratings, wiring/driver specs, heat-footprint diagrams, and commissioning instructions. Always quote or link to the specific model manual for precise mounting height, input, wiring, and clearance figures rather than generalizing from other models.
What gas-specific standards govern hoses, connectors, regulators and propane cylinder details I must include?
Reference ANSI Z21.54 / CSA 8.4 for gas hose connectors for portable outdoor appliances (only use listed assemblies). Note regulator practices and standard outlet pressures (common ~11 in. water column for LP), and reference manufacturer/regulator datasheets (e.g., MAXITROL) and supplier product pages for capacities and part numbers. Mention Overfill Prevention Devices (OPD) on DOT 20-lb cylinders and standards that govern them (e.g., ANSI/CGA guidance) and advise compatibility checks and listed-adapter use only.
What electrical-code and listing requirements are essential when covering electric/infrared DIY heater builds?
State that permanently installed electric heaters must comply with the NEC (NFPA 70): size branch-circuit conductors and breakers for continuous loads at 125% and follow wiring methods and disconnect/overcurrent rules. Require UL 1278 (or equivalent listed standard) certification for electric heater elements and advise that a licensed electrician should perform fixed electrical work and final testing. For weatherproof installations, include IP rating requirements from product docs.
Which supplier and product‑type references should I include to produce accurate parts lists and costs for readers?
Use reputable suppliers and catalogs (Grainger, RV supply shops, HVAC/gas distributors, manufacturer accessory lists) for part numbers, capacities, and pricing for regulators, listed hose assemblies, thermocouples, safety tilt switches, solenoid valves, listed burners, electric heater modules (UL‑listed), and mounting hardware. Provide ranges/estimates and link to product pages for current pricing; emphasize using UL/CSA‑listed parts where standards require them.
What safety systems and components must be described and what certification is required for them?
Describe and require listed safety components: listed gas regulators sized to appliance input; listed hose/pigtails (ANSI Z21.54/CSA 8.4); automatic shutoff/tilt switches; thermocouples and safety valves (e.g., thermocouple-controlled gas valves and listed solenoid shutoffs); flame-failure devices and overtemperature cutouts for electric systems; and RCD/GFCI protection where needed. State that gas trains and safety valves used in fixed/converted appliances often require factory-listed assemblies or documented field-conversion allowances per ANSI/CSA Z83.26 and NFPA 54.