
Most patio heater ignition failures come down to a dead or missing battery. Brands like Fire Sense, AZ Patio Heaters, Hiland, and Outland all use small electronic pulse igniters that run on a single AA, AAA, or 9-volt battery, and swapping it out takes about five minutes with a Phillips screwdriver. Turn the gas off at the tank, let the heater cool, unscrew the igniter cap, pop in a fresh battery with the positive terminal facing the right direction, and you're usually back in business.
How to Replace Battery in Patio Heater: Safe DIY Steps

Grant Mercer
5 Aug 2026
Quick safety precautions before you start
Working near propane is not the place to improvise. Before you touch anything on the heater, run through this checklist every single time, even if the job looks trivial.
- Turn the control knob fully to OFF. Confirm it's seated in the detent, not just partially closed.
- Close the propane cylinder valve by turning it clockwise until it stops. On larger tank setups, close the line valve at the tank too.
- Disconnect the regulator from the cylinder if you need to move or tilt the heater to access the battery compartment.
- Allow the heater to cool completely before touching it. Many manufacturer manuals specify waiting at least 45 minutes after the last use. The emitter screen, reflector, and burner head retain heat long after the flame goes out.
- Work outdoors or in a very well-ventilated area. Never service a gas appliance in a closed garage or enclosed porch.
- Keep ignition sources, including cigarettes, lighters, and power tools, away from the work area until the gas is reconnected, leak-checked, and confirmed safe.
- After reassembly and before relighting, perform a leak check by applying soapy water to every gas connection you touched. Bubbles mean a leak. Do not light the heater until all connections are confirmed bubble-free.
Battery replacement itself carries no real electrical hazard since these igniters run on 1.5V or 9V cells, but the gas side of the appliance still demands respect. Treat every step as if gas is present.
How patio heater ignition systems actually use batteries
Not every patio heater has a battery. There are three ignition types found on consumer heaters, and only one of them needs a battery to spark.
| Ignition Type | How It Works | Battery Required? | Typical Brands / Models |
|---|---|---|---|
| Piezo (mechanical) | Squeezing a spring-loaded hammer strikes a crystal to generate a spark. Completely self-contained. | No | Many older and budget models; often a smaller click-style button |
| Electronic / pulse igniter | A battery powers a small electronic module that fires a high-voltage spark on demand. | Yes — AA, AAA, or 9V | Fire Sense, AZ Patio Heaters, Hiland/Four Seasons, Outland Living, Hampton Bay, some Fireluxe units |
| Push-to-hold pilot with thermocouple only | No spark at all — you hold the control knob in PILOT, manually light the pilot with a lighter or match, and the thermocouple holds the valve open. | No | Some propane heaters and older commercial-style units |
Electronic pulse igniters are by far the most common type on mid-range and newer consumer heaters. When you press the igniter button and hear a rapid clicking (or used to hear one), that's the pulse module firing. When the clicking stops or never happens, the battery is usually the first thing to check. Mechanical piezo igniters produce a single, louder click per press and need no battery, if you have one of those and it's not sparking, the crystal or hammer mechanism has likely failed rather than a battery.
How to confirm your heater uses a battery
Check the model label and owner's manual
The quickest way to confirm is to look up your model number. The label is almost always on the base of the heater pole, on the back of the control panel, or on the underside of the reflector dome. Once you have the model number, search for the owner's manual using that exact string. The battery type, size, and compartment location will be in the specifications table and the lighting instructions section. If you no longer have the manual, manufacturer websites and third-party manual repositories host PDFs for most Fire Sense, AZ, Hiland, Outland, and Hampton Bay models. If you need step-by-step repair instructions beyond battery checks, see our how to fix a patio heater guide. blank" rel="noopener noreferrer">Hiland Flame owner’s manual explicitly lists “igniter button battery missing or dead, replace AA/AAA battery” and shows the battery compartment located behind the igniter button or under a removable cap.
Visual checks when you don't have the manual
- Look at the igniter button itself. If it's a larger, rounder button (often red or black, about the size of a quarter) and screws off or has a visible seam, it almost certainly contains a battery compartment.
- A piezo button is typically smaller, harder to press, and produces a single audible click. There's no compartment to open.
- Some heaters route a thin wire from the control knob area down toward the base or up toward the burner head — that wire goes to the electrode. Following it back to a small plastic or metal housing with a cap usually confirms an electronic module.
- If pressing the igniter produces rapid, repeated clicking, it's electronic and battery-powered. A single sharp click per press is piezo.
Finding the battery compartment
Manufacturers put the battery compartment in different spots depending on the heater's design, and hunting for it the first time is the most common frustration. Here are the locations I've come across most often.
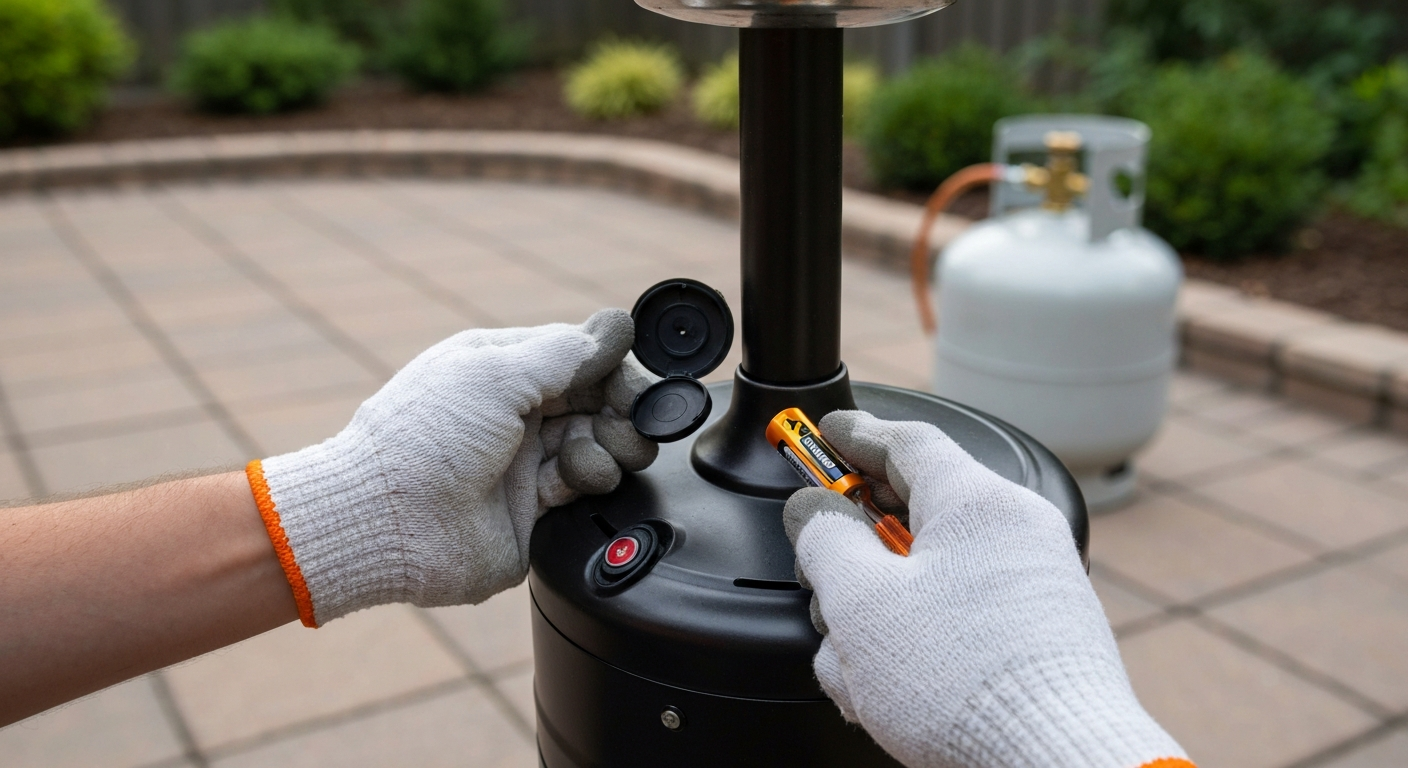
- Inside the igniter button cap: This is the most common location on Hiland, AZ, and Fire Sense mushroom-style heaters. The red or black button cap unscrews counterclockwise (some are finger-tight, others need a gentle grip with a cloth). The battery sits in a small tube directly behind the button.
- In a separate compartment on the control panel housing: Some models have a small rectangular battery door on the back or side of the control box, secured by a single Phillips screw or a push-tab.
- At the base of the pole, inside the housing: A few taller mushroom heaters run the wiring down the pole and locate the module near the base. Look for a small access panel or a removable section of the lower pole housing.
- In an external pulse igniter module mounted near the burner: On some propane fire tables and Outland-style units, a small plastic pulse module clips onto the burner frame near the electrode. The battery slots into this module directly.
- Under the control knob faceplate: On certain built-in ignition modules, you need to remove a decorative faceplate (two or three screws) before the battery compartment is accessible.
If you're unsure, gently trace the wire from the igniter button or from the spark electrode. The wire will lead you directly to the module or compartment that holds the battery. Don't force any caps or covers, most unscrew or slide rather than pry.
Battery types, sizes, and polarity
Getting the right battery matters. Putting in the wrong voltage or reversing polarity will either do nothing or, in rare cases, damage the igniter module. Here's what to expect by heater type.
| Battery Size | Voltage | Common Heater Models That Use It | Notes |
|---|---|---|---|
| AA | 1.5V | Many Fire Sense models, some AZ Patio Heaters, Outland pulse igniters, some Hiland models | Most common overall; alkaline or lithium both work |
| AAA | 1.5V | Some AZ Patio Heaters models, some Hiland Flame units | Check compartment markings — AAA can look like AA at a glance |
| 9V (block) | 9V | Some Fireluxe units, larger built-in electronic ignition modules, some grill-style heaters | Snap connector on the battery leads; always match connector type |
To confirm the correct size before buying: open the compartment and look at the existing battery (even if dead, the size is printed on the cell). If there's no battery present, look inside the compartment for the size printed or embossed on the plastic housing, or check the polarity markings: a longer tube with a single spring contact is for AA or AAA; a pair of snap connectors signals a 9V slot. Alkaline batteries (brands like Duracell or Energizer) are perfectly fine for this application. Lithium AAs are a good choice if the heater lives outdoors year-round and gets exposed to cold temperatures, since lithium cells maintain output better below freezing.
Polarity is always marked inside the compartment with a + and - symbol, or by a raised diagram showing which end of the battery faces which direction. The positive terminal (+ end, the small nub) almost always faces toward the spring contact on AA and AAA installations. On 9V installs, the connector only snaps on one way, so reversed polarity isn't physically possible. Take a photo of the old battery before removing it if you're unsure.
Tools and materials you'll need
- Medium Phillips-head screwdriver (most igniter caps and panel screws use a #2 Phillips)
- Flathead screwdriver (sometimes useful for prying a battery cover tab)
- Fresh replacement battery in the correct size (AA, AAA, or 9V — confirm before starting)
- Soapy water in a small spray bottle or cup, and a brush or cloth for leak testing
- Soft cloth or rubber gloves for gripping the igniter cap if it's tight
- Digital multimeter capable of reading DC millivolts (optional, but very useful if ignition still fails after battery swap — you'll want it for thermocouple testing)
- Needle-tip pipe cleaner or compressed air (for pilot tube cleaning if needed — covered later)
- Flashlight or headlamp for seeing inside compartments
Step-by-step battery replacement procedure
- Complete all safety precautions listed above: knob to OFF, tank valve closed, heater cooled.
- Locate the battery compartment using the method described in the section above for your heater style.
- If the battery is behind the igniter button cap, grip the cap firmly and turn counterclockwise. Most caps are finger-tight after the first installation. If it won't budge, wrap a rubber band around it for grip, or use a cloth. Do not use pliers, which can crack the plastic housing.
- If the compartment is behind a panel with screws, set the screws in a small cup so they don't roll away.
- Remove the old battery. Note the orientation before pulling it out, or take a quick photo. If there's corrosion on the contacts (white or blue-green residue), clean it now with a cotton swab dampened with a small amount of white vinegar, then dry completely before inserting a new battery.
- Insert the new battery with correct polarity. The + end of an AA or AAA cell should face toward the contact marked + inside the housing (usually away from the spring). Press it in firmly until you feel it seat.
- For a 9V battery, align the snap connectors and press until you hear a click.
- Reassemble the igniter cap or panel. On threaded caps, turn clockwise until snug — firm hand-tight is enough. Do not overtighten plastic threads.
- Before reconnecting gas, test the igniter by pressing the button. You should hear rapid, repeated clicking and see a spark at the electrode (visible through the pilot assembly if you look at the right angle). If you get clicking and spark, the battery replacement is successful.
- Reconnect the propane cylinder and open the tank valve slowly (one full turn counterclockwise is enough for most single-use cylinders).
- Apply soapy water to the regulator connection and the hose fitting. Watch for bubbles for at least 15 seconds. If you see any, close the valve, tighten the connection, and retest. Do not proceed until there are no bubbles.
Testing the ignition after the battery swap
Here's the exact test sequence I use after every battery replacement. Follow your model's lighting instructions precisely, but this covers the standard procedure for most mushroom-style propane heaters.
- Make sure the tank valve is open and the regulator is connected and leak-free.
- Turn the control knob to PILOT (or press and turn to the pilot position, depending on your model). Press and hold the knob in.
- While holding the knob in, press the igniter button. You should hear rapid clicking and see the pilot light within one to three clicks. If it doesn't light in the first few attempts, wait 30 seconds for any residual gas to clear, then try again.
- Once the pilot is lit, continue holding the control knob in the pilot position for the time specified in your manual. Most Hiland and AZ models require 15 to 30 seconds. This hold time allows the thermocouple tip to heat up enough to generate the millivoltage that holds the gas valve open.
- Slowly release the knob. The pilot should stay lit. If it immediately goes out when you release the knob, the thermocouple is not signaling the valve — this is not a battery problem and requires thermocouple diagnosis (covered below).
- If the pilot stays lit, turn the control knob to your desired heat setting. The main burner should light from the pilot with a soft whomp or click-on sound.
- Observe the flame pattern for 60 seconds. A healthy main burner flame is even, blue at the base, and stable. Yellow or orange tips in isolation are normal on propane, but a heavily yellow, lazy flame can indicate a blocked orifice or low gas pressure.
If ignition still fails: quick diagnostic checklist
A fresh battery fixes the problem most of the time. When it doesn't, work through this checklist in order before reaching for the phone to call a technician. Most of these issues are DIY-repairable. For a full step‑by‑step walkthrough, see our guide on how to fix propane patio heater which covers diagnostic flows, part numbers, and repair tips.
Battery contacts and corrosion
Open the compartment again and look closely at the metal contacts. Even on a new-looking heater, moisture can cause greenish or white buildup on the contact spring or the contact pad. Clean the contacts with a cotton swab barely moistened with white vinegar, scrub gently, dry completely with a clean swab, and then reinsert the battery. Corroded contacts are a very common cause of no-spark even with a good battery.
Loose or disconnected wiring
Trace the wire from the igniter module to the spark electrode at the pilot assembly. On heaters that have been moved, blown over, or just used for several seasons, the wire can vibrate loose from its push-on connector at the electrode or at the module. Reconnect any loose connectors by pushing them firmly until they seat. Also check that the wire isn't pinched, cracked, or chafed against a metal edge, a damaged wire can bleed the spark to ground before it reaches the electrode.
No clicking at all after a fresh battery
If the button produces no clicking sound even with a confirmed good battery and clean contacts, the igniter module itself has likely failed. Replacement pulse igniter modules are inexpensive (typically under $15) and are sold by most heater parts suppliers by module type or by heater model number. This is a straightforward swap: disconnect the wire from the old module, remove the module from the housing, and reverse the process with the new one.
Cleaning the thermocouple: when to clean versus when to replace
If the battery and spark are confirmed good but the pilot won't stay lit when you release the control knob, the thermocouple is the next suspect. The thermocouple is the small metal probe positioned so its tip sits in the pilot flame. When it gets hot enough, it generates a small DC voltage (typically around 20 to 30 millivolts open-circuit when fully heated) that signals the gas valve to stay open. A dirty or degraded thermocouple generates too little voltage, and the valve closes.
Before replacing the thermocouple, try cleaning it. Carbon and oxidation buildup on the tip can insulate it from the flame and reduce output. With the heater off and cooled, use fine steel wool or light sandpaper (400-grit) to gently polish the thermocouple tip, the last half-inch or so that sits in the flame. You want bare, shiny metal. Wipe off any residue with a dry cloth. Relight and test. If the pilot now stays lit, cleaning was the fix.
If cleaning doesn't help, test the thermocouple output with a multimeter set to DC millivolts. Light the pilot, hold the knob for the full hold time, then measure voltage between the thermocouple's tip wire and its body with the meter leads. A reading below roughly 9 to 15 millivolts under load (connected to the valve) typically indicates a thermocouple that needs replacement. For a step‑by‑step walkthrough on how to fix thermocouple on patio heater, see the thermocouple repair guide (reference ID 27973cb1-cf4b-47c6-bbc5-37df55c58a8e). See our step-by-step guide on how to clean patio heater thermocouple for a detailed walkthrough of testing and replacement procedures. A detailed walkthrough of this test and the replacement process lives in the thermocouple repair guides on this site. For a primer on thermocouple function and why they fail, see our guide on how does a thermocouple work on a patio heater.
Cleaning the pilot tube and checking electrode alignment
If you have spark and confirmed gas flow but the pilot won't light at all, or lights unreliably, the pilot tube orifice is often blocked with spider webs, debris, or carbon deposits. Manufacturer troubleshooting recommends confirming gas flow, purging air on first fill, cleaning the pilot orifice, checking electrode gap and wiring, and trying manual lighting to isolate igniter versus gas-supply issues (see AZ Patio Heaters, Troubleshooting (spark present but pilot won’t light: gas/orifice/electrode checks)) blank" rel="noopener noreferrer">AZ Patio Heaters — Troubleshooting (spark present but pilot won’t light: gas/orifice/electrode checks). This is extremely common on heaters that have been stored outdoors. To clean it: turn off and disconnect the gas, locate the small brass pilot orifice fitting at the base of the pilot assembly, and use a needle-tip pipe cleaner or a can of compressed air to clear the passage. For a step-by-step guide on how to clean a patio heater pilot tube, see the dedicated how-to on this site. Do not use a metal wire or drill bit to ream the orifice, you'll enlarge it and change the gas pressure dynamics.
Electrode alignment is the other common culprit when you have spark but no pilot ignition. The electrode tip should be positioned roughly 1/8 to 3/16 of an inch (about 3 to 5 mm) from the pilot hood or ground target. Too far and the spark won't jump reliably; too close and it may short out rather than arc. Gently bend the electrode bracket to adjust the gap if needed, do this slowly and carefully to avoid cracking the ceramic insulator around the electrode. If the ceramic is cracked or chipped, the electrode is leaking spark to ground and needs replacement.
Checking safety switches and tilt switch operation
Most mushroom-style patio heaters include a tilt switch (also called an anti-tip switch or safety shut-off switch) that cuts gas flow if the heater is knocked over beyond a certain angle. This is a safety feature, not a fault, but it can cause confusion when the heater was recently moved, stored on its side, or is sitting on uneven ground. The switch is typically a small weighted ball or pendulum mechanism located in the base of the heater.
To check it: ensure the heater is standing on a flat, level surface. If the legs or base are uneven, the tilt switch may be tripped even without any actual tipping. Adjust the feet or move the heater to level ground. Some models have a reset button or require you to press a small rubber button at the base to reset the switch after a tip event. Consult your manual for the exact reset procedure for your model. A tilt switch that trips repeatedly even on a level surface may have a weakened mechanism and need replacement.
Regulator and gas supply checks for propane heaters
If everything electrical checks out and the thermocouple is good, but the heater still doesn't produce a decent pilot or main flame, the issue may be gas supply rather than ignition. Work through these checks in order.
- Confirm the cylinder is not empty. Weigh it or shake it gently — a full 1 lb. cylinder feels noticeably heavier than an empty one. Larger tanks can be checked with a gauge.
- Check that the tank valve is fully open. Turn counterclockwise until it stops gently. Don't just crack it open — a partially open valve can restrict flow below the minimum for the pilot.
- Check for a flow-limiting state. Many propane regulators have a built-in safety feature that restricts gas flow if the valve is opened too quickly. To reset it: close the tank valve, disconnect the regulator, wait 30 seconds, reconnect the regulator, and then open the tank valve very slowly (about a quarter turn per second). This often restores normal flow.
- Inspect the regulator hose for kinks, cracks, or visible damage. A kinked hose between the regulator and the burner assembly restricts flow significantly.
- If you suspect the regulator itself is faulty (correct pressure under no-flow but pressure drops to near zero under load), replacement is the right call. Regulators are not user-serviceable internally. Regulator replacement is covered in a dedicated guide on this site.
Common follow-up repairs and next steps
Battery replacement is often the first step in a diagnosis that uncovers a secondary issue. Here's a quick map of where to go next based on what you find after replacing the battery.
| Symptom After Battery Swap | Most Likely Cause | Recommended Next Step |
|---|---|---|
| Pilot won't stay lit when knob released | Thermocouple dirty or failed | Clean thermocouple tip; test mV output; replace if below threshold |
| Clicking present but pilot won't light | Blocked pilot tube or misaligned electrode | Clean pilot orifice; check and adjust electrode gap to 3–5 mm |
| No clicking even with fresh battery | Failed igniter module or corroded contacts | Clean contacts; replace igniter module if needed |
| Pilot lights but main burner won't ignite | Blocked main orifice or low gas pressure | Check orifice; check regulator flow; consider regulator replacement |
| Heater shuts off after a few minutes | Tilt switch tripping or thermocouple generating low mV | Level the heater; test tilt switch reset; test thermocouple output |
| Heater won't light at all despite gas and spark | Regulator in flow-limiting mode or empty tank | Reset regulator; verify tank has fuel |
Battery life expectations and signs a battery is failing
A standard alkaline AA or AAA battery in a patio heater igniter will typically last one to three seasons of normal use. The actual lifespan varies quite a bit depending on how often you fire the heater up, whether the heater lives outdoors year-round in humid or cold conditions, and whether the battery contacts are clean and making good connection. A battery that sits in a damp compartment will corrode and fail much faster than one in a covered, dry location.
Signs a battery is nearing the end of its life in an igniter include: slower or weaker clicking (fewer pulses per button press), a faint or intermittent spark visible at the electrode instead of a strong, consistent arc, and eventually no clicking at all. Some pulse igniter modules will produce clicking from a partially depleted battery but not enough voltage to generate a reliable spark, which is why a heater that worked fine last season may click without lighting this season. When in doubt, replace the battery, they cost less than a dollar and eliminate a variable.
Cold weather significantly shortens effective battery life. Below about 40°F (4°C), standard alkaline cells lose a meaningful portion of their capacity. If you use your heater in cooler months, lithium AA or AAA batteries are worth the slight price premium, they hold their voltage down to around -40°F and last longer in an outdoor appliance.
Safe disposal and recycling of used batteries
Standard AA, AAA, and 9V alkaline batteries are not classified as hazardous waste in most U.S. states and can legally go in household trash in those locations, but recycling is the better option. Retailers like Best Buy, Staples, Home Depot, and most large hardware stores accept used household batteries at in-store drop-off bins at no charge. Call2Recycle (call2recycle.org) maintains a searchable locator for drop-off points across the U.S. and Canada.
Do not put batteries in recycling bins unless your municipality's program explicitly accepts them loose, most curbside recycling programs do not process batteries and they can cause fires in sorting facilities. Store used batteries in a small container with tape over the terminals until you make a drop-off trip.
Preventative maintenance to avoid future ignition problems
Replacing the battery reactively every time ignition fails is fine, but a small amount of proactive maintenance keeps the whole ignition system reliable and avoids cascading failures. Here's what I do at the start and end of each season.
Start-of-season checks (spring)
- Replace the battery proactively if it's been in the heater all winter, even if it still works. Cold storage drains alkaline cells.
- Inspect the battery compartment for any moisture or corrosion and clean contacts before inserting a new battery.
- Run a compressed-air blast through the pilot tube orifice to clear any spider webs or debris that accumulated during storage.
- Check the spark electrode for carbon buildup and clean gently with fine sandpaper or steel wool.
- Inspect the regulator hose for cracking or UV degradation — hoses should be replaced every five years or at any sign of surface cracking.
- Perform a full leak check before the first light of the season.
End-of-season checks (fall)
- Remove the battery before storage. Leaving a battery in a damp compartment all winter is the single biggest cause of corroded contacts.
- Clean the thermocouple tip with fine steel wool before storing.
- Cover the heater with a fitted weather cover to keep insects and moisture out of the pilot and burner assemblies.
- Store propane cylinders upright in a ventilated outdoor area, never in a garage or enclosed space.
When to call a professional
Most ignition issues on patio heaters are genuinely DIY-repairable, batteries, thermocouple cleaning, pilot tube cleaning, electrode adjustment, and even thermocouple and regulator replacement are all reasonable tasks for a careful homeowner with basic tools. But there are situations where calling a qualified gas appliance technician is the right call, and I want to be direct about those.
- You smell gas at any point during the process and cannot identify or eliminate the source with a soapy-water test. Shut off the tank valve immediately, move away from the heater, and call your propane supplier or a technician before relighting.
- The gas valve body, valve seat, or internal valve components appear damaged or corroded. Gas valves are not user-serviceable and should be replaced by a qualified technician.
- The heater has been physically damaged: a significant fall, impact damage to the burner assembly, crushed or kinked gas lines, or a cracked regulator body.
- You've worked through every diagnostic step in this guide and the heater still won't function safely. At that point, the cost of a service call is almost always less than the risk of a gas leak or fire.
- The heater is more than 10 years old and has never had a professional inspection. Older heaters can develop corrosion and wear in components that aren't visible during routine maintenance.
- Any time you feel uncertain or uncomfortable with a step. There is no DIY repair worth a gas incident — trust that instinct.
For most heaters, though, a fresh battery, clean contacts, and a quick check of the thermocouple and pilot tube will get you back to a warm patio in under 30 minutes. Work methodically, don't skip the safety steps, and you'll extend the life of your heater well beyond what the manufacturer might expect.
FAQ
How do I know if my patio heater uses a battery for ignition and what types are common?
Check the owner’s manual or look at the igniter button/cap: most consumer patio heaters use a battery‑powered electronic/pulse igniter. Common user‑replaceable types are AA or AAA cells (single cell inside the igniter module) and, on some larger or built‑in modules, a 9‑volt block. If the heater uses a piezo igniter no battery will be present.
What safety steps should I take before replacing the battery?
Turn the control knob to OFF, close and disconnect the propane cylinder or shut off gas supply, allow the heater to cool completely, work outdoors or in a well‑ventilated area, avoid open flames, and have a soapy leak‑check solution available for reassembly checks. Only use light hand tools and do not disassemble gas valves.
What tools and supplies will I need?
Small Phillips screwdriver (or required driver for igniter cap), replacement battery (AA/AAA/9V as specified by your model), gloves and safety glasses, needle or pipe cleaner and compressed air for pilot cleaning, digital multimeter (optional, for thermocouple mV checks), a soapy water leak‑check solution, and a small flashlight.
Step‑by‑step: how do I replace the battery in the igniter module?
1) Ensure safety steps: heater OFF, gas closed and cooled. 2) Locate igniter cap/button (often on the burner tube or control panel). 3) Unscrew/remove the igniter cap or lens per manual. 4) Remove old battery, noting polarity printed inside the compartment. 5) Insert new battery with correct polarity and secure it in place. 6) Reassemble the cap and tighten. 7) Reopen gas and perform a leak check before lighting.
How do I test the igniter and lighting procedure after replacing the battery?
With gas reconnected and leak‑checked, open the cylinder valve and follow the manufacturer lighting steps: set control to PILOT, press igniter and listen/observe for spark, press/hold the control knob to light the pilot and hold for the specified time (typically 15–30 seconds), then release and confirm pilot stays lit. If you hear a click but no spark is visible, inspect the electrode area for debris; if spark visible but no flame, check gas flow and orifice.
If replacing the battery doesn’t fix ignition, what quick diagnostics should I run?
1) Confirm gas supply: tank not empty, tank valve open, regulator/hose connected. 2) Try manual lighting per manual to isolate igniter vs fuel issue. 3) Inspect electrode: clean debris, check wiring and electrode tip alignment and gap (typical gap ~3–5 mm). 4) Clean pilot orifice with a needle/pipe cleaner and blow out with low‑pressure air. 5) Check the tilt/safety switch and that burner head is correctly seated. 6) If pilot lights but won’t stay, test thermocouple output with a DMM (see next question). If these fail, escalate to valve/regulator checks or professional service.